Learn how to draw a fabulous girl!
Step One: Conceptualizing
1.
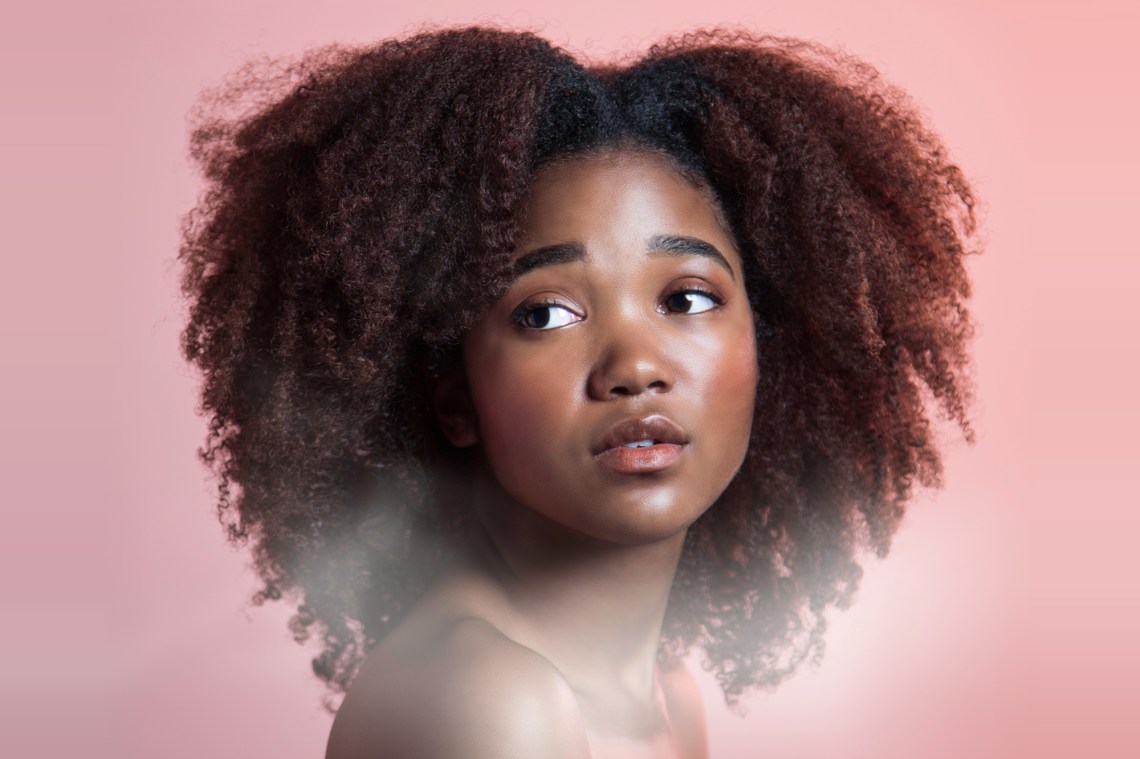
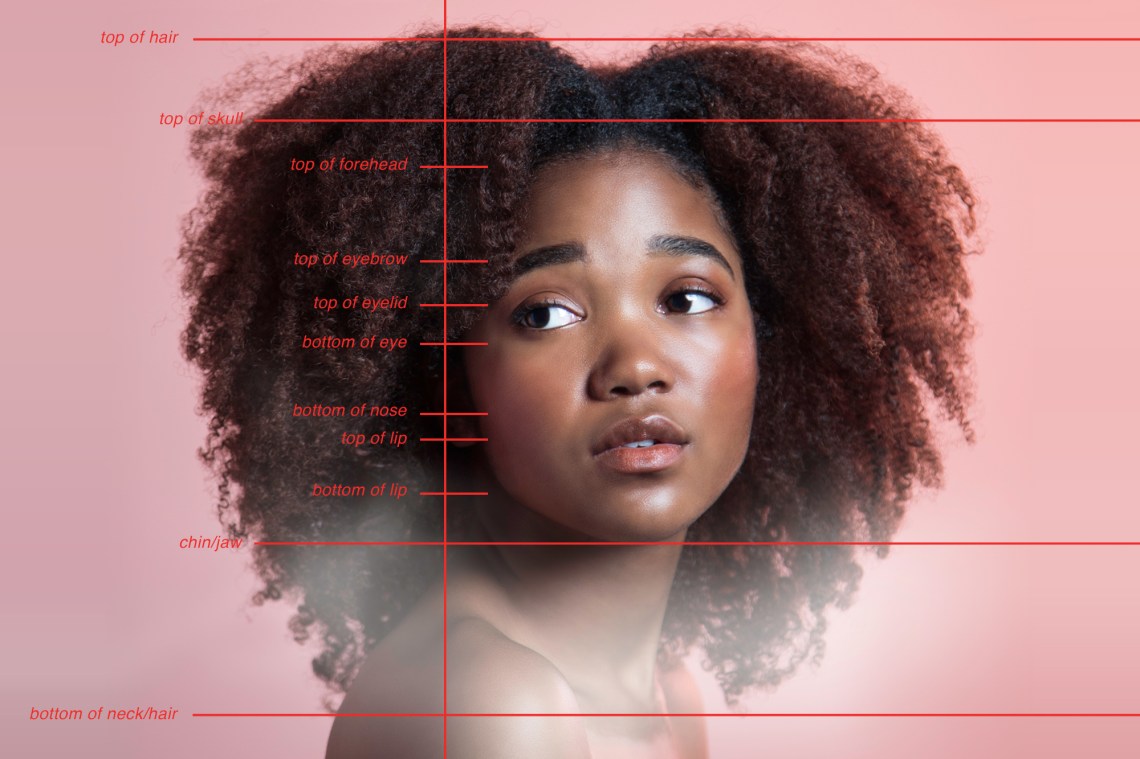
Lets begin by finding a good clear image to work from.
Daniella Urdinlaiz
Step Two: Frame the Image
2.
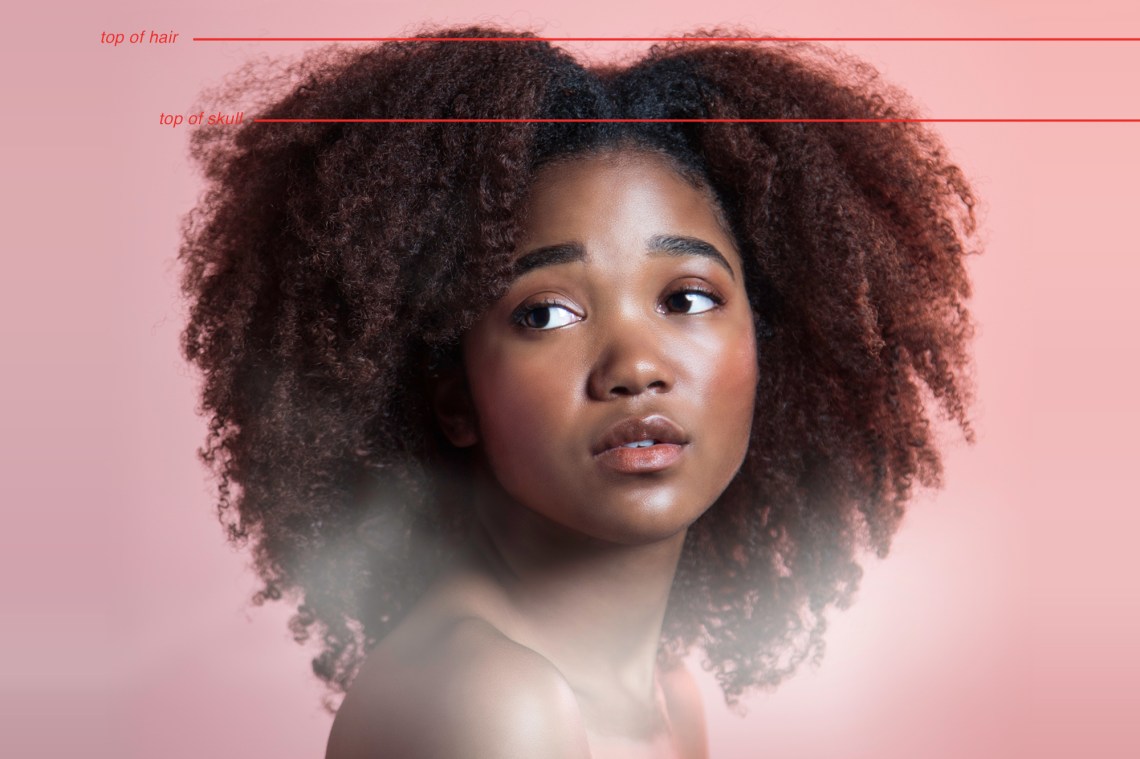
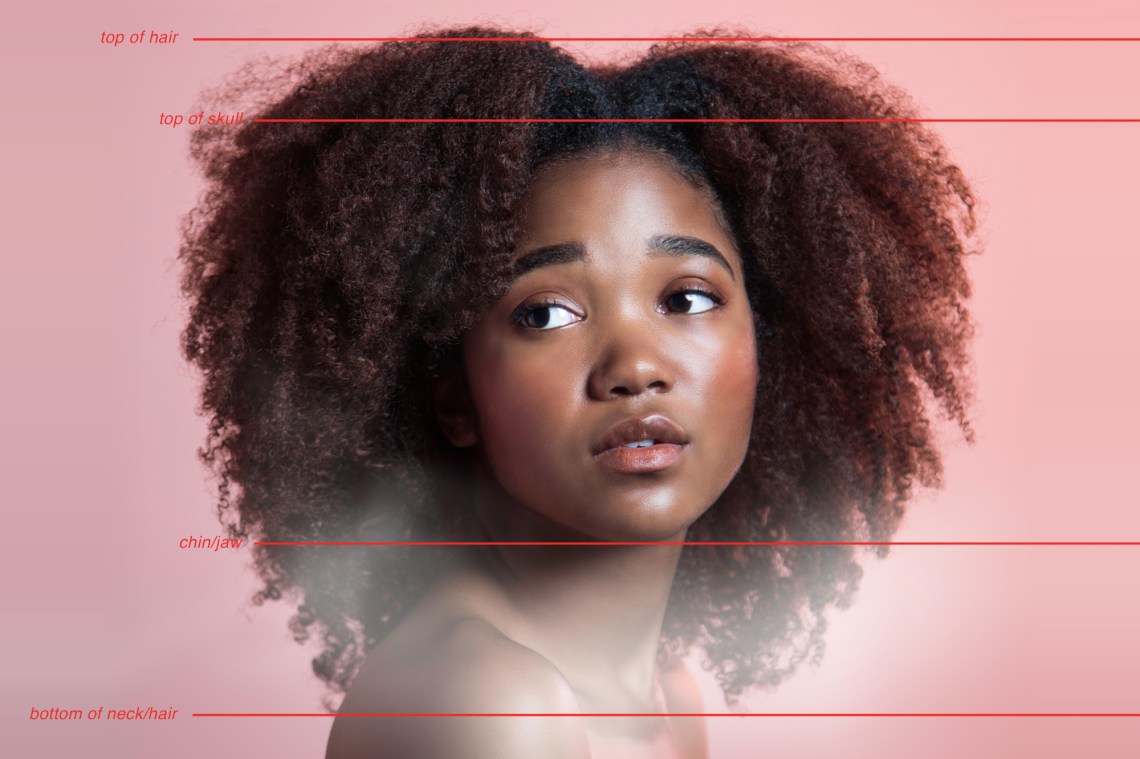
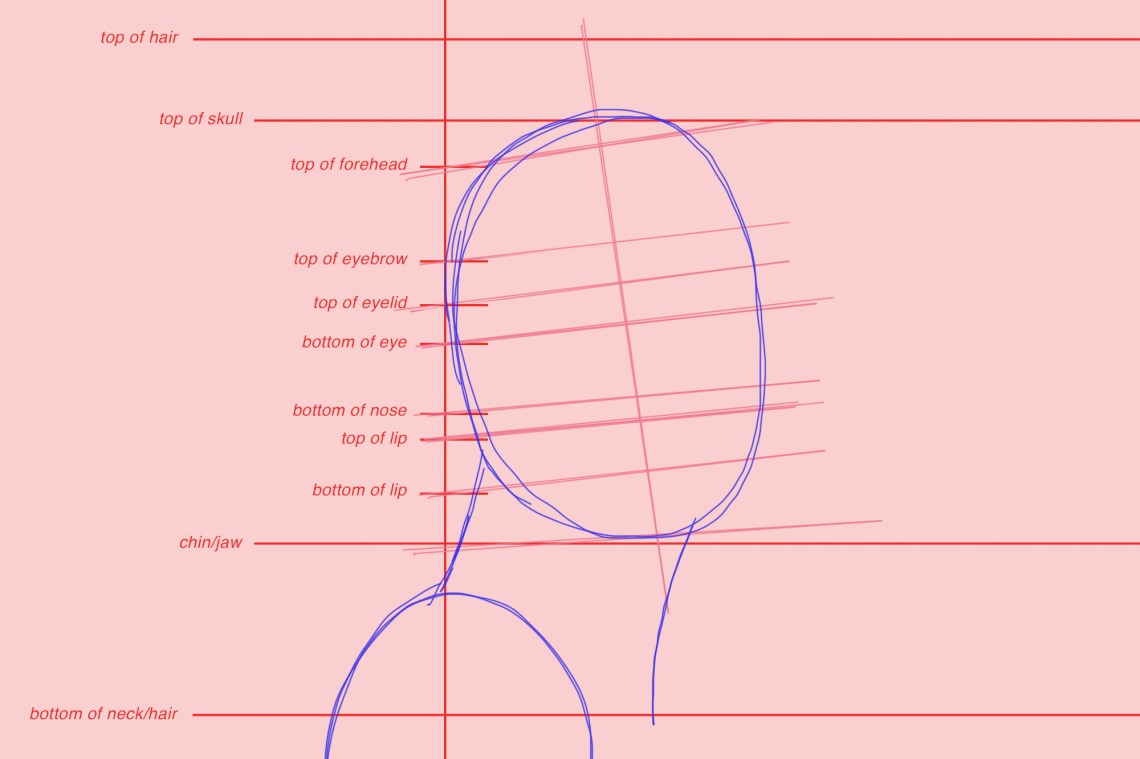
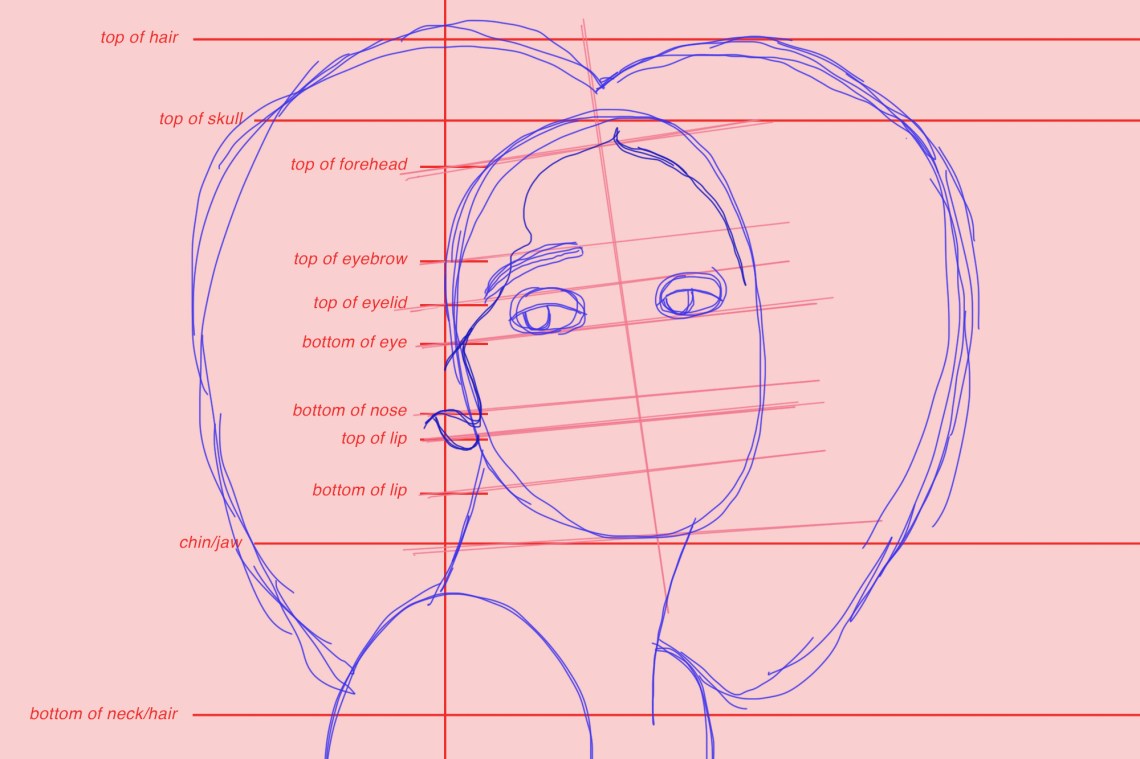
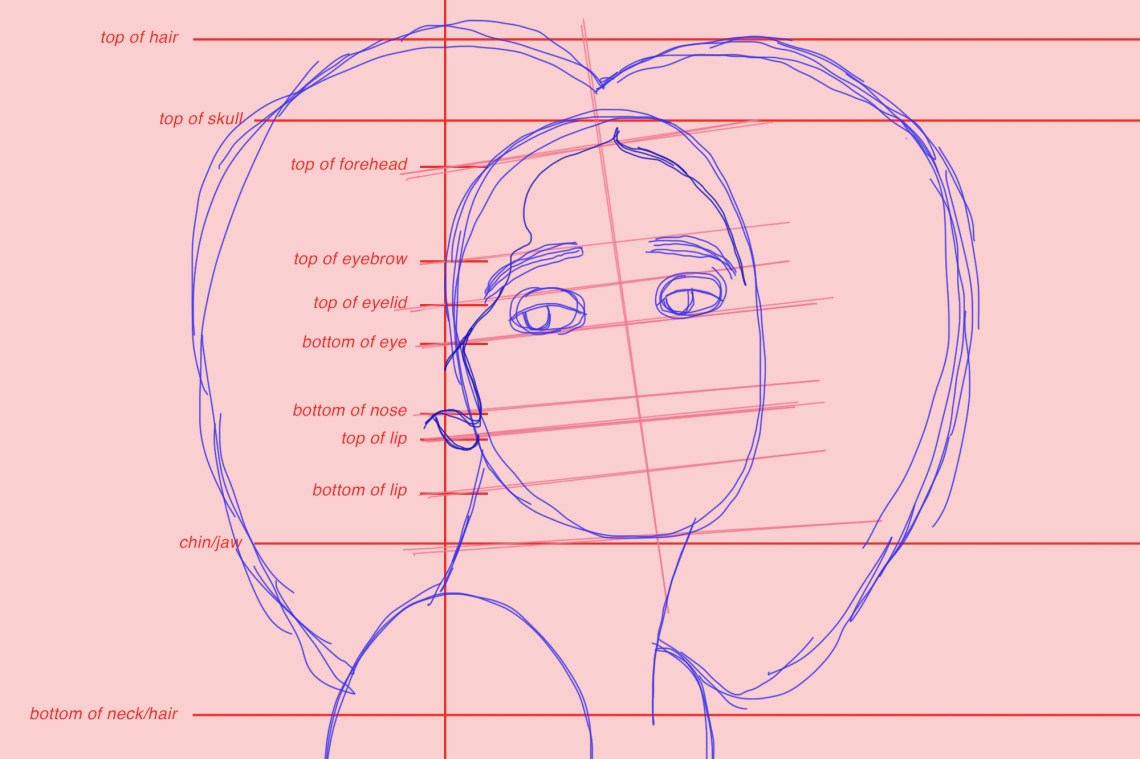
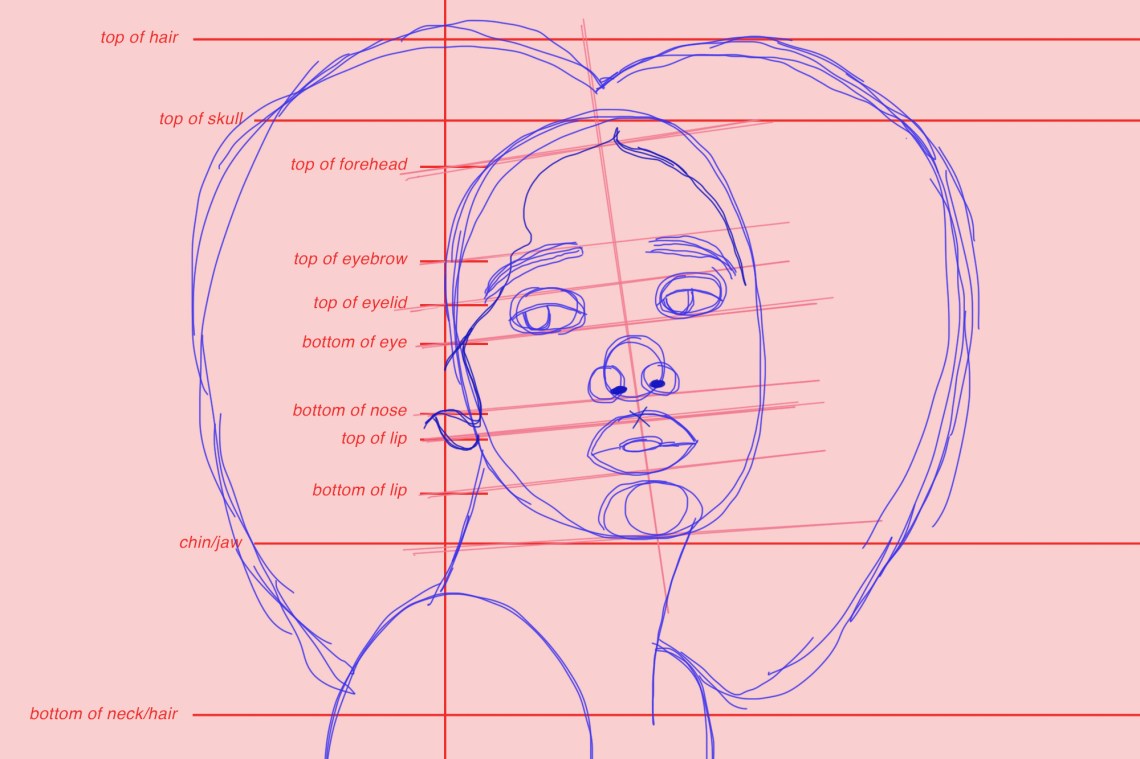
Were going to draw guidelines of where everything is in the frame to make things easier for us.
This is the top of the hair.

Draw a line for the top of the skull.
This should be above where the forehead starts.
And the bottom of the neck which is subsequently the bottom of where her hair falls.
Jessica Felicio
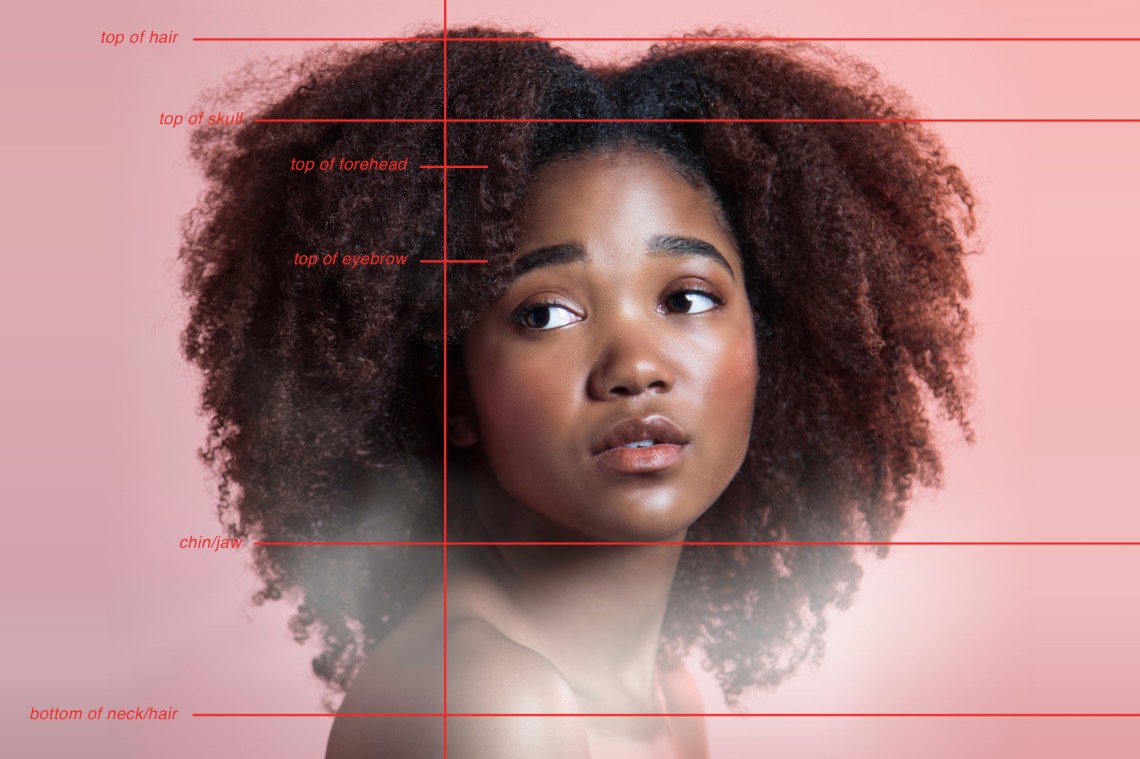
Next, Im drawing a vertical line down the side to help us out more with facial feature placement.
Look at how much space each facial feature takes up.
Lets place a tick mark where the top of the forehead is.

Now a tick mark for the top of the eyebrow, which is also the bottom of the forehead.
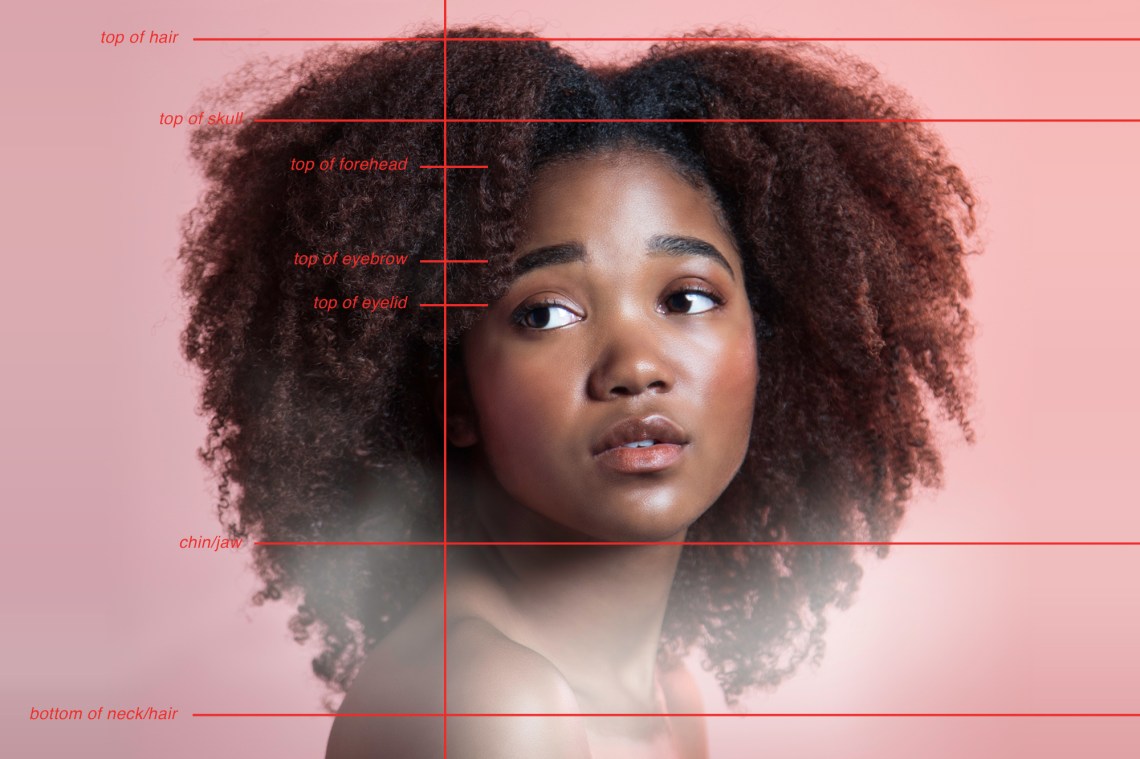
A tick for the top of the eye or eyelid.
Now the bottom of the eye.
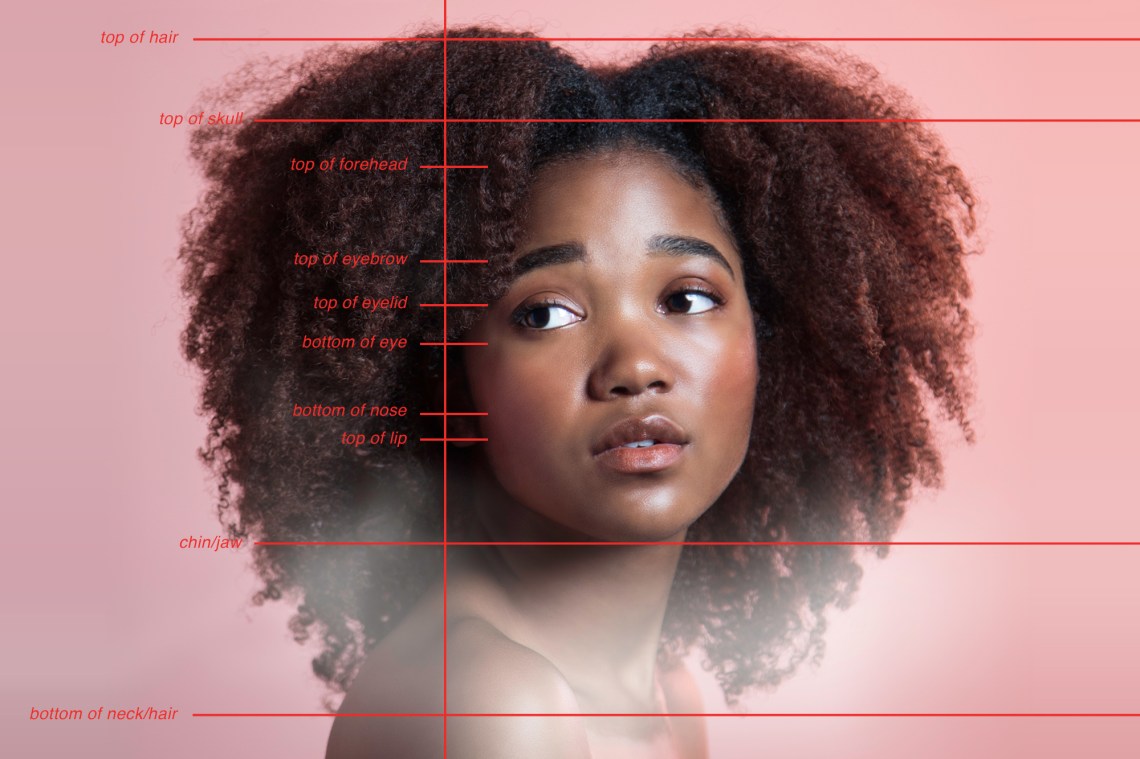
Bottom of the nose.
Now its time to mark down the top of her lips.
Then the bottom of her lips.

Step Three: Add Lines That Position Her Face
14.
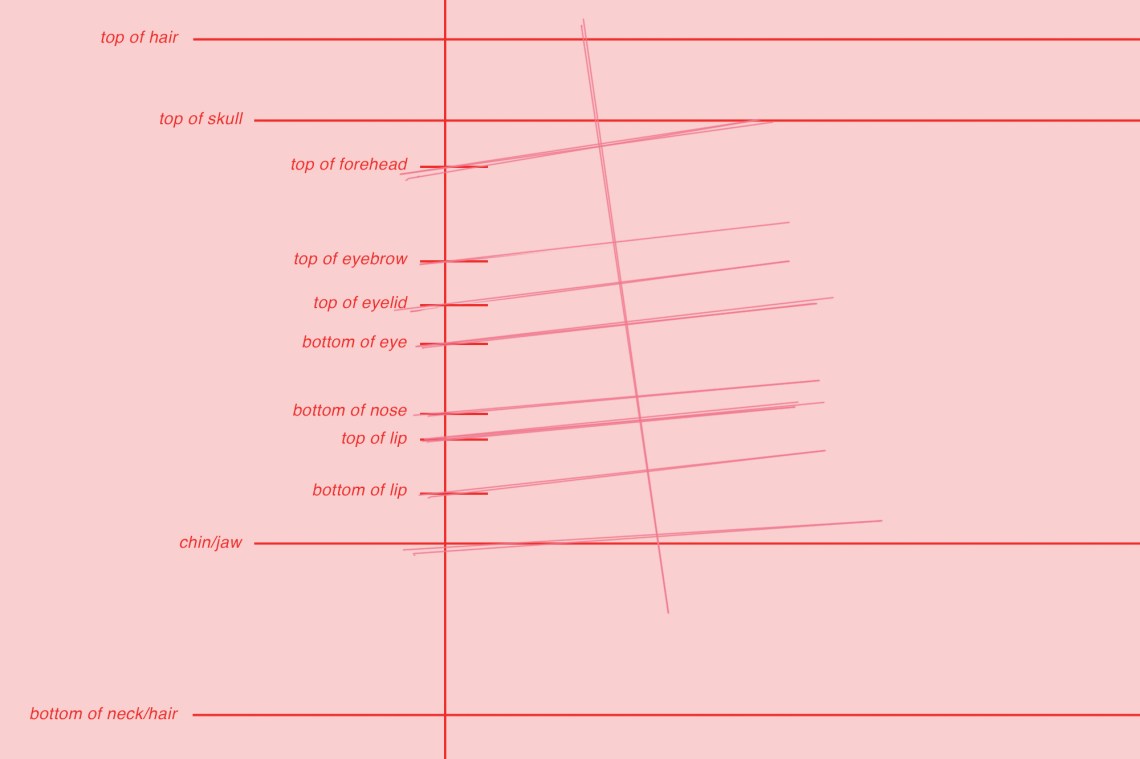
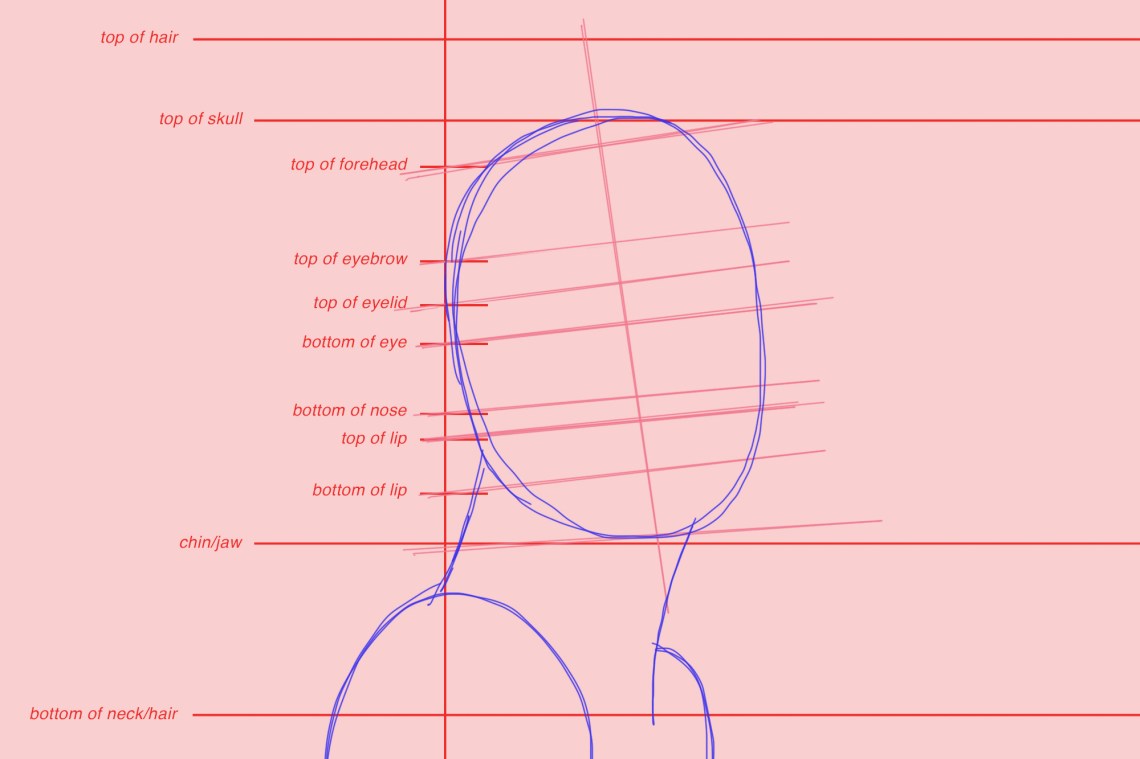
Lets make another line where the center of her face is.
Step Four: Remove the Image
16.
Now, lets take away that image and see if we can do this all on our own!
Step Five: Establish the Shape
17.
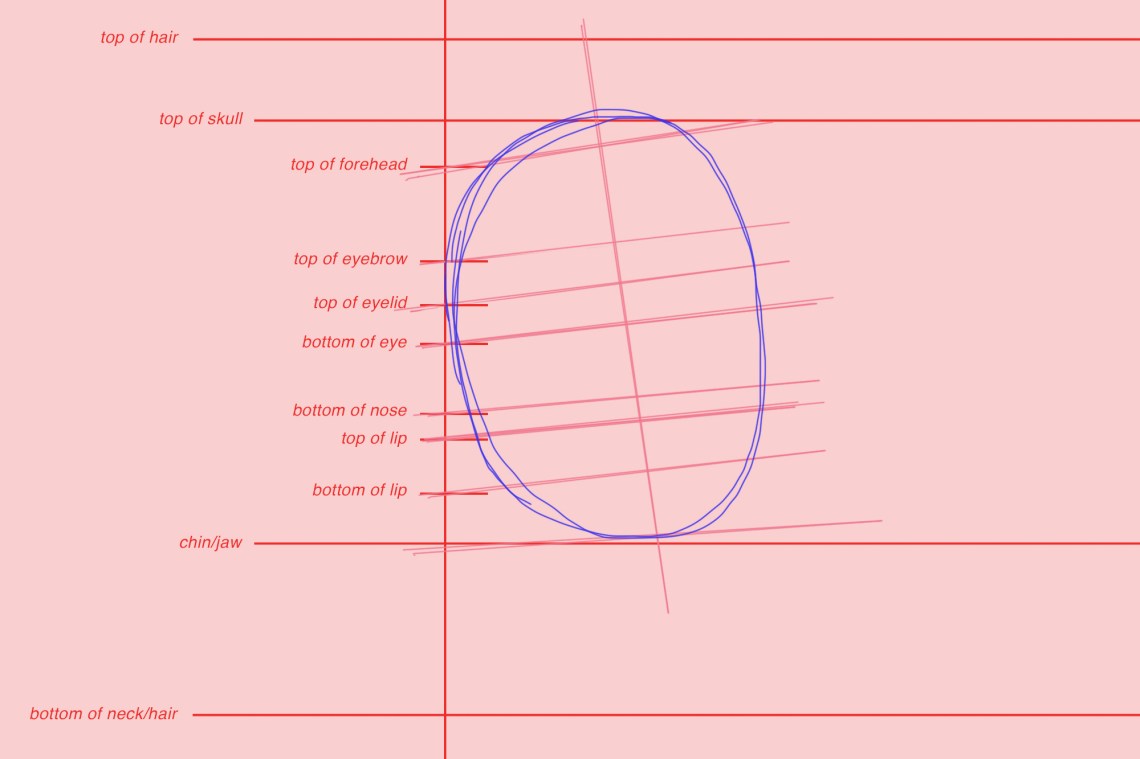
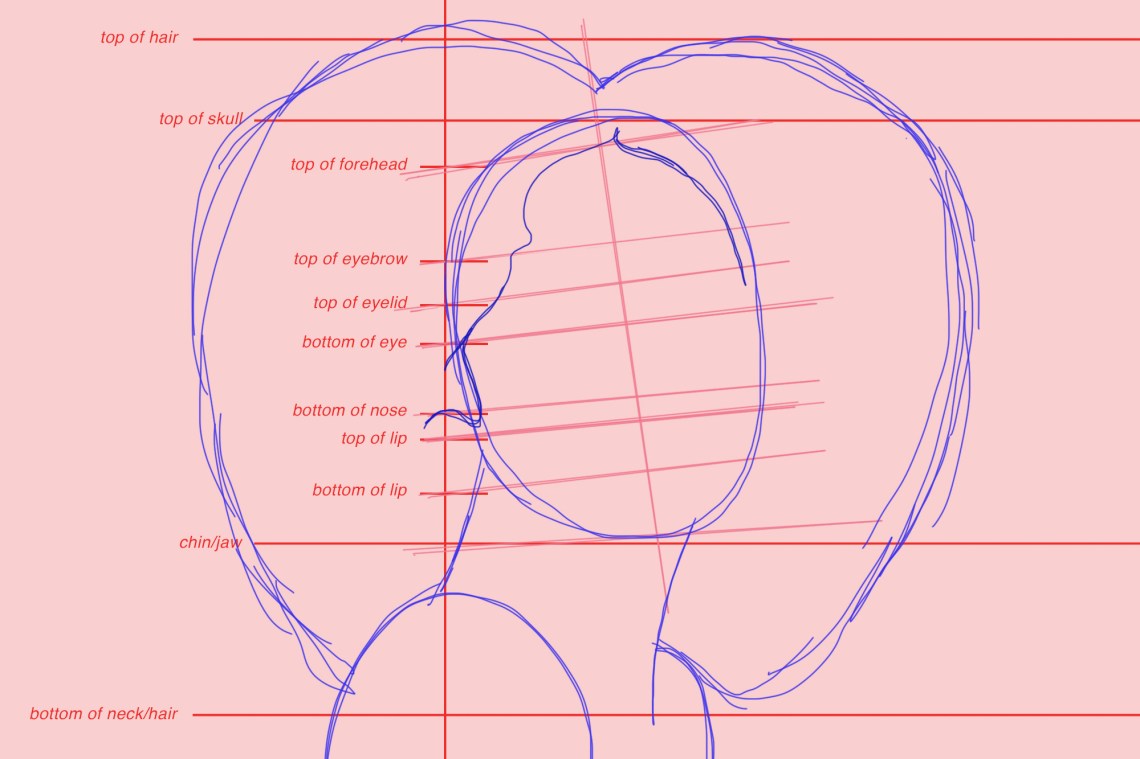
Draw an oval for her face.

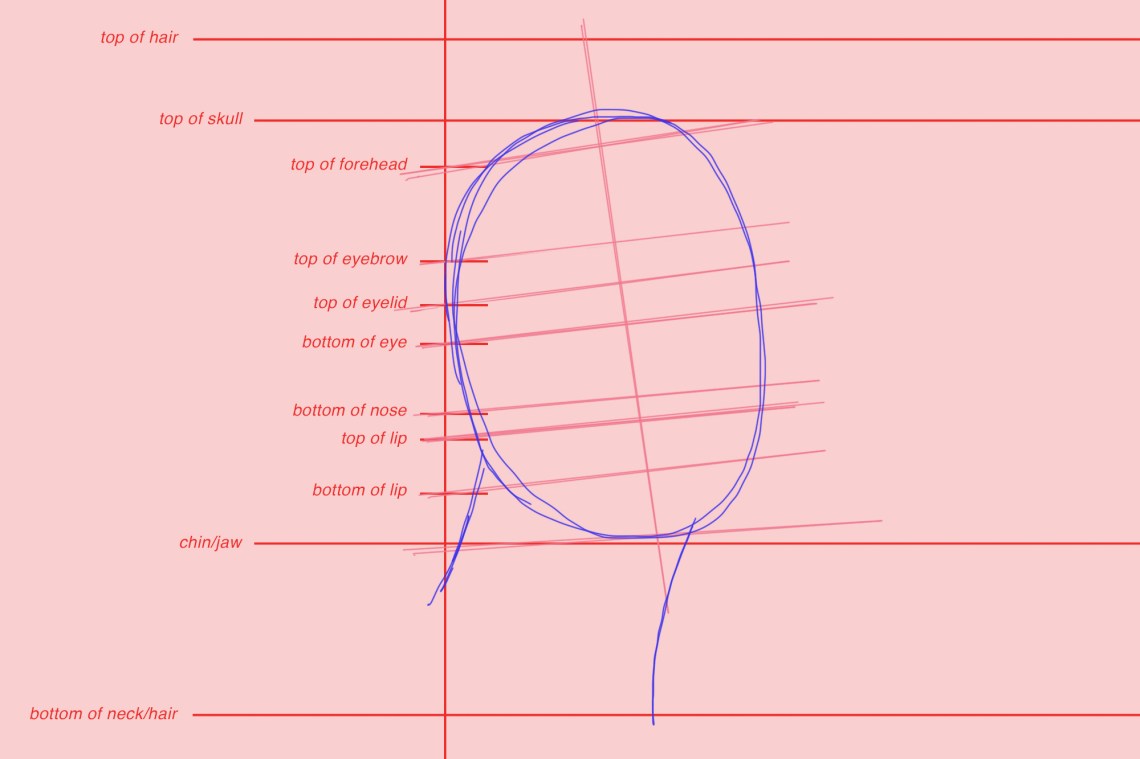
Lets draw two slightly curved lines for our neck.
Next is that shoulder, which is nothing more than the top part of an oval.
Now for the other shoulder.

Lets draw the hair now.
We should start out rough as drawing hair is a pretty complex process.
Well begin by drawing the exterior shape her hair takes.
It kind of resembles a heart.
Now we can draw in that ear, or the bottom of it at least.
The bottoms of your ears land close to the bottom of the nose or top of the lip.
In her case, its the top of her lip.
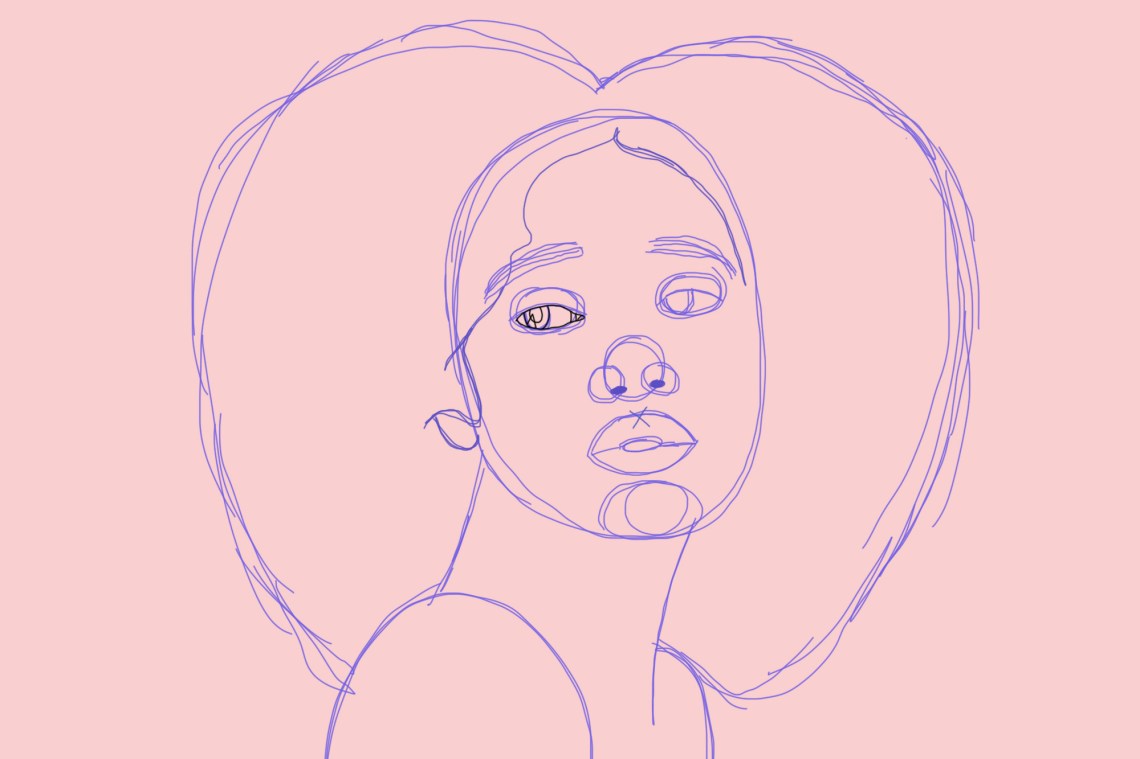
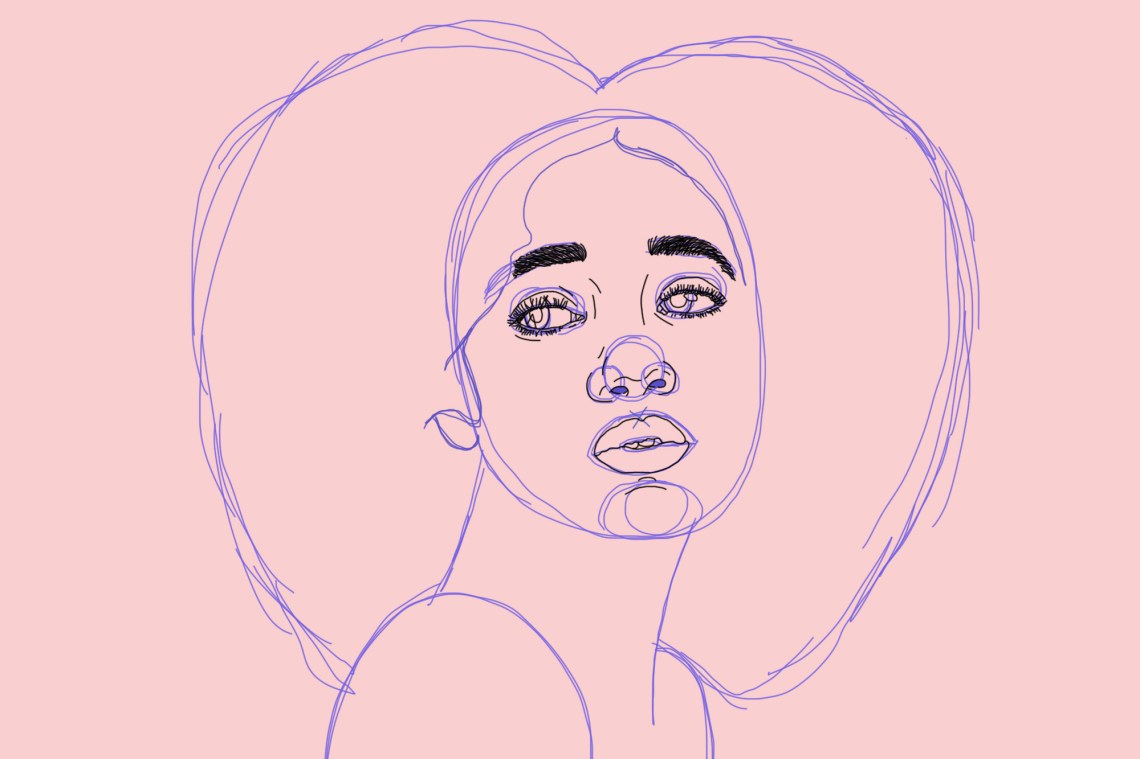
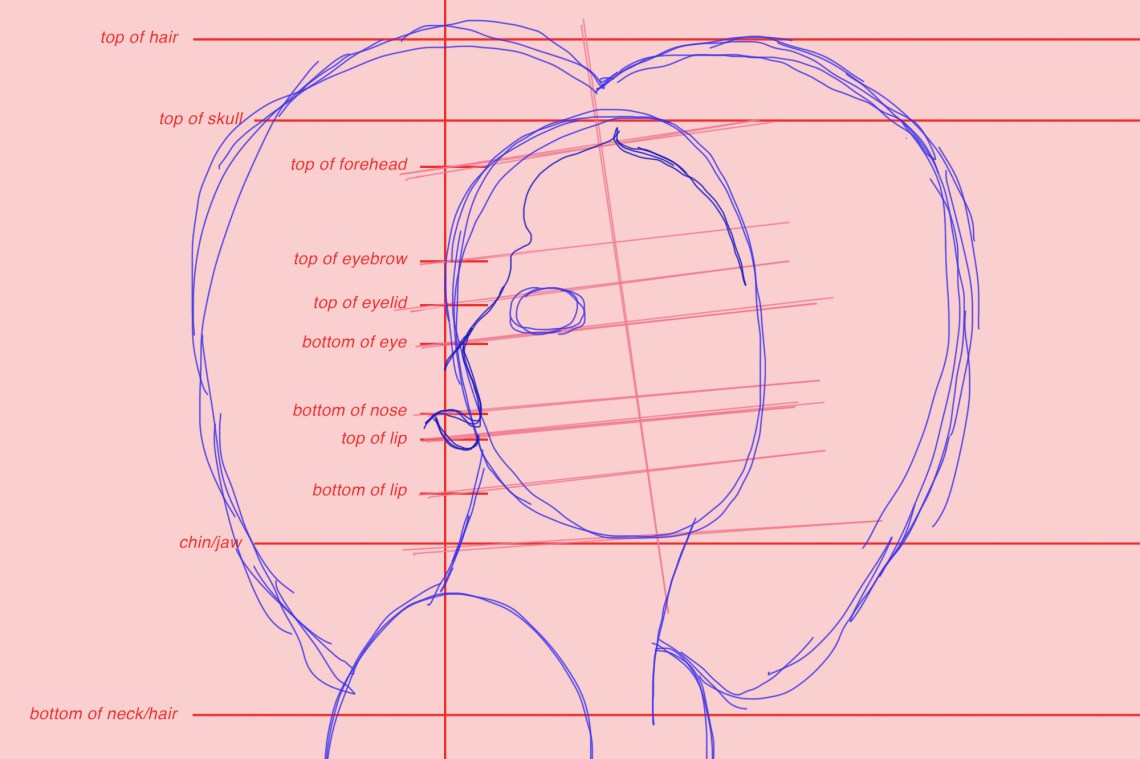
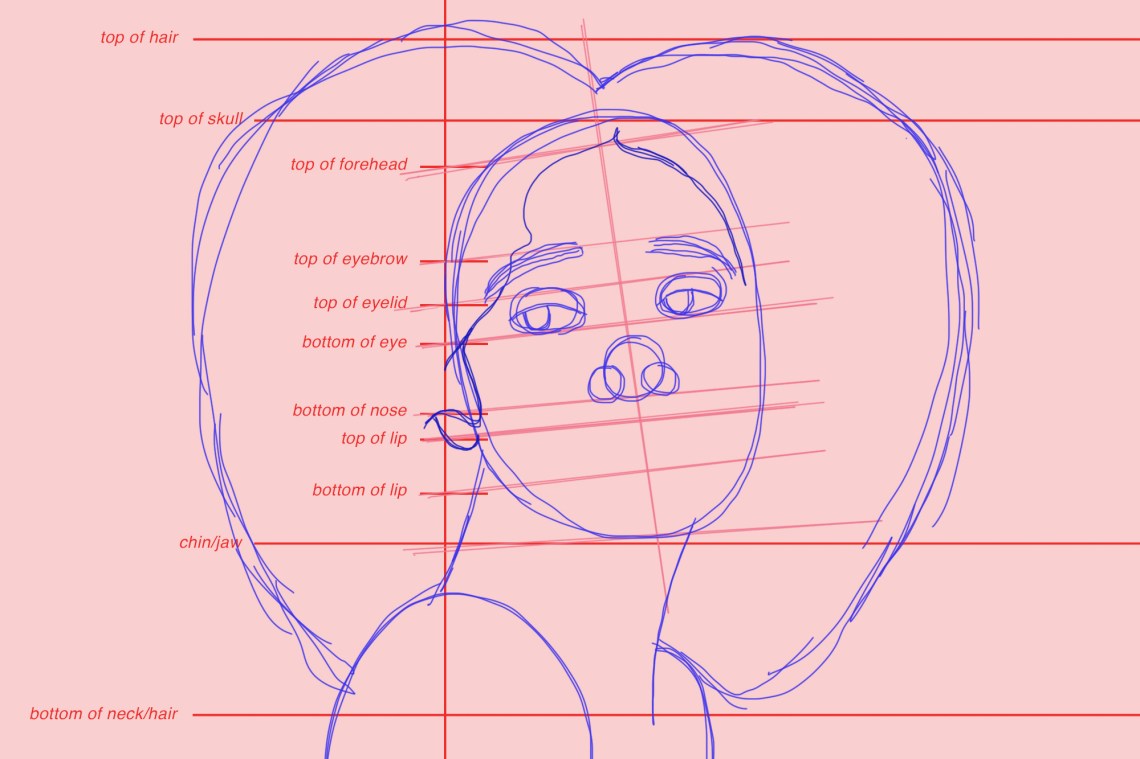
Step Six: Begin Drawing Facial Features
33.
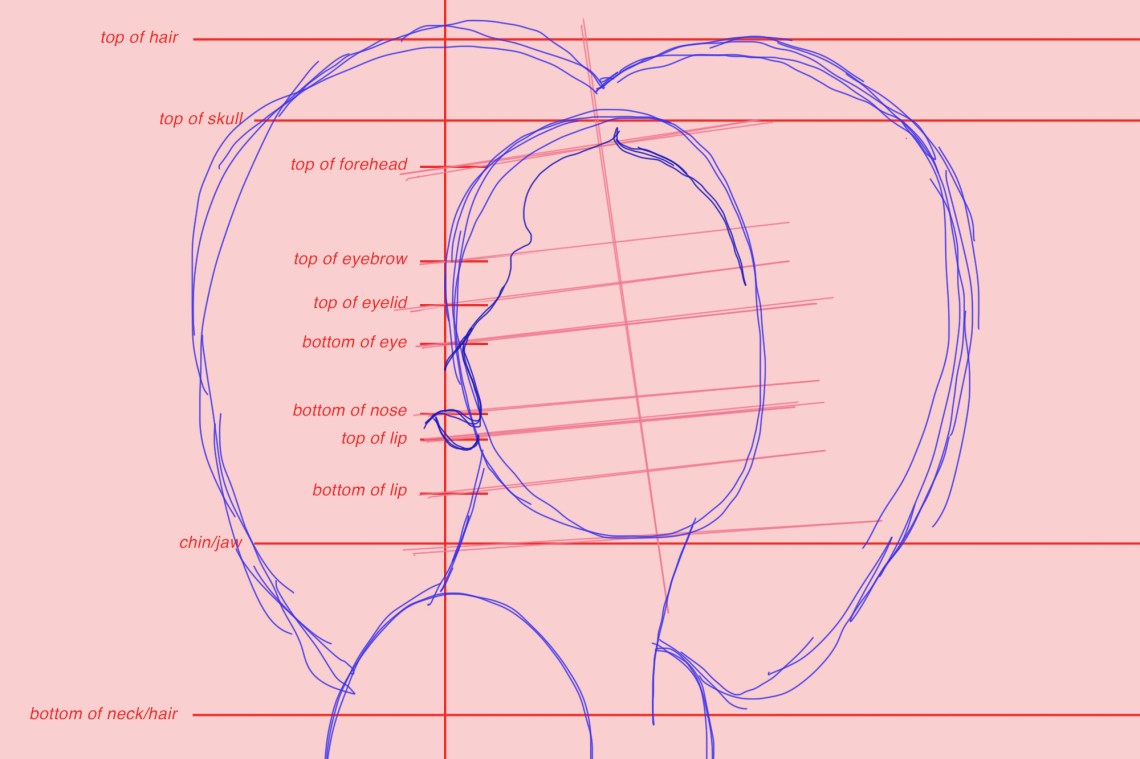
Next comes the eyes.

Well start by drawing an oval in that area.
Nothing too fancy yet!
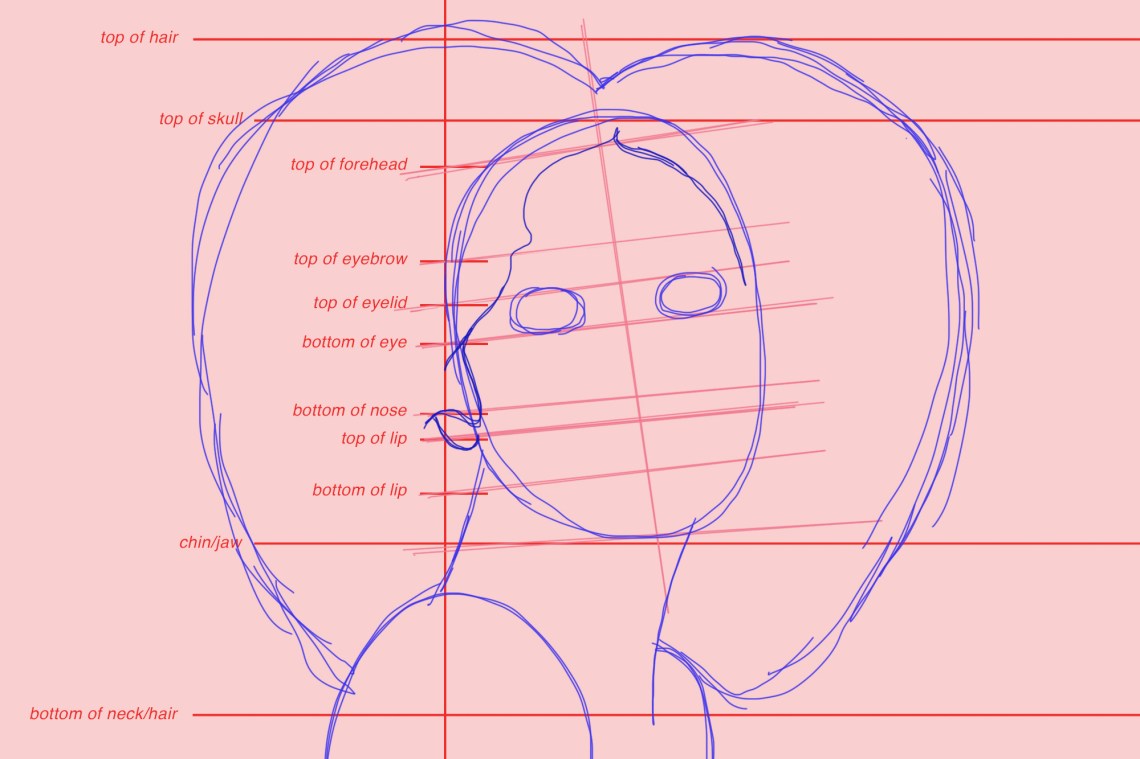
Do the other eye.

Now, lets draw a curved line for the bottom of her top eyelid.
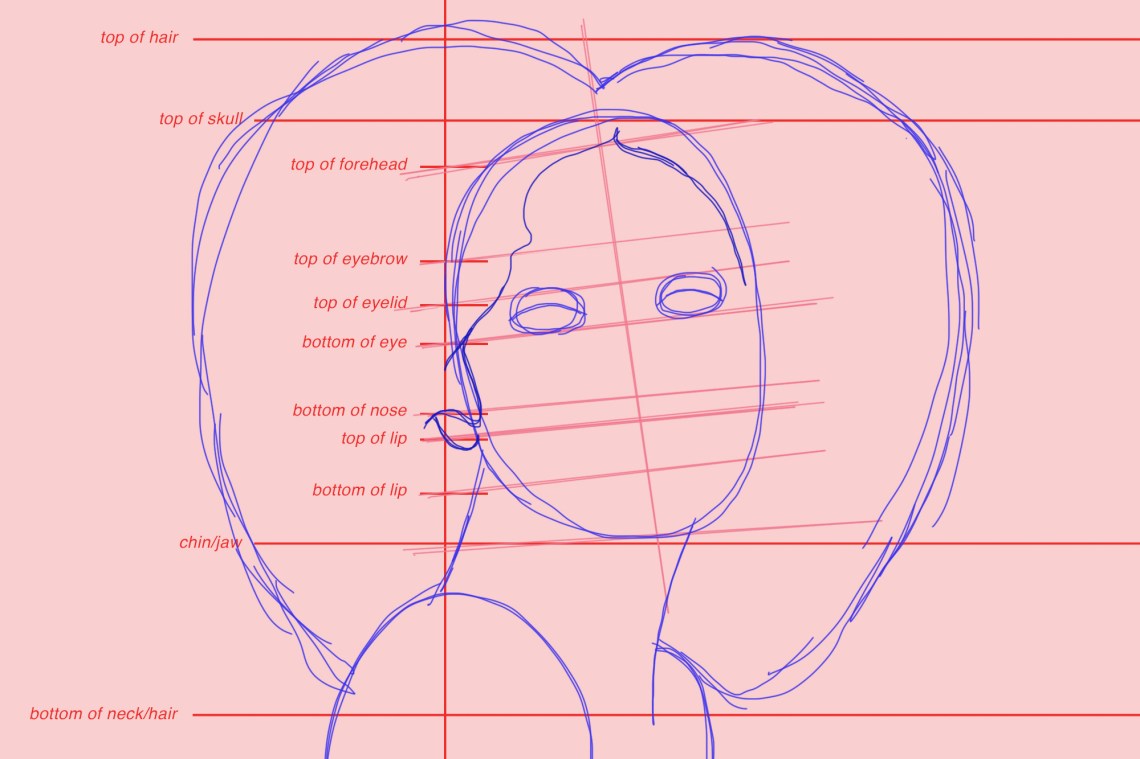
Now for our iris, which is nothing more than a small circle.
Get that other iris in there.
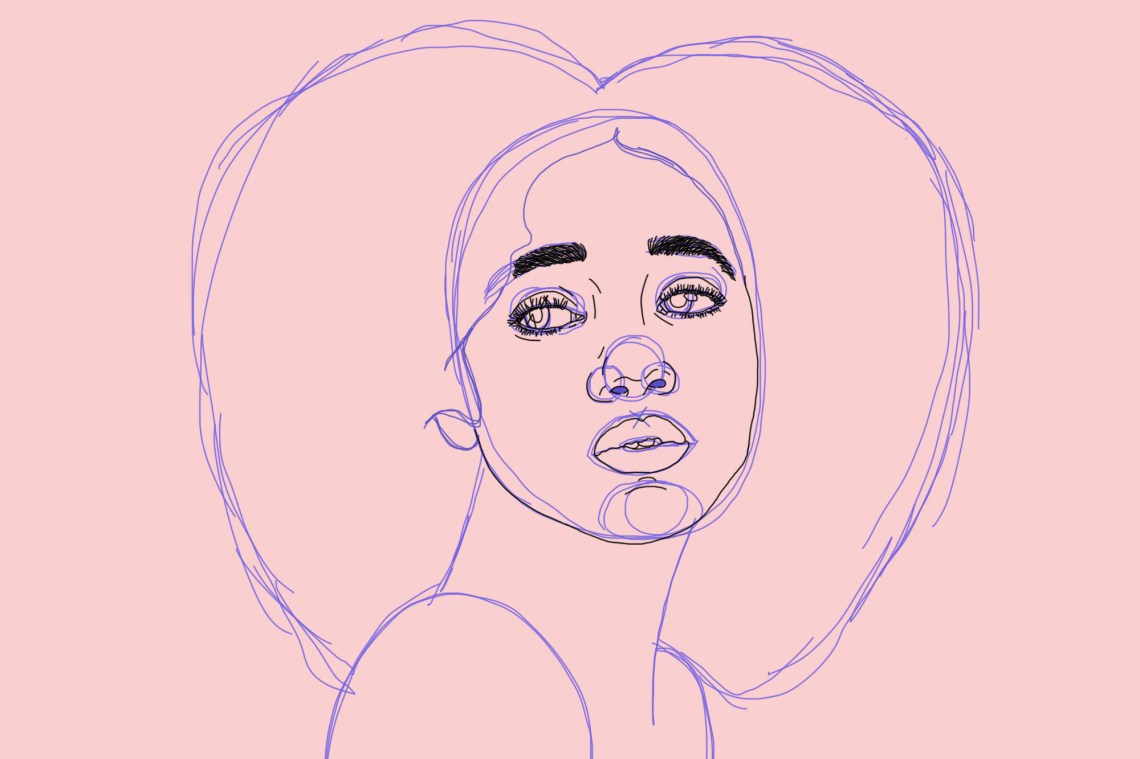
As a placeholder, lets draw some curved lines that take on the shape of her eyebrows.
Shes got some good healthy brows.
And the other brow.
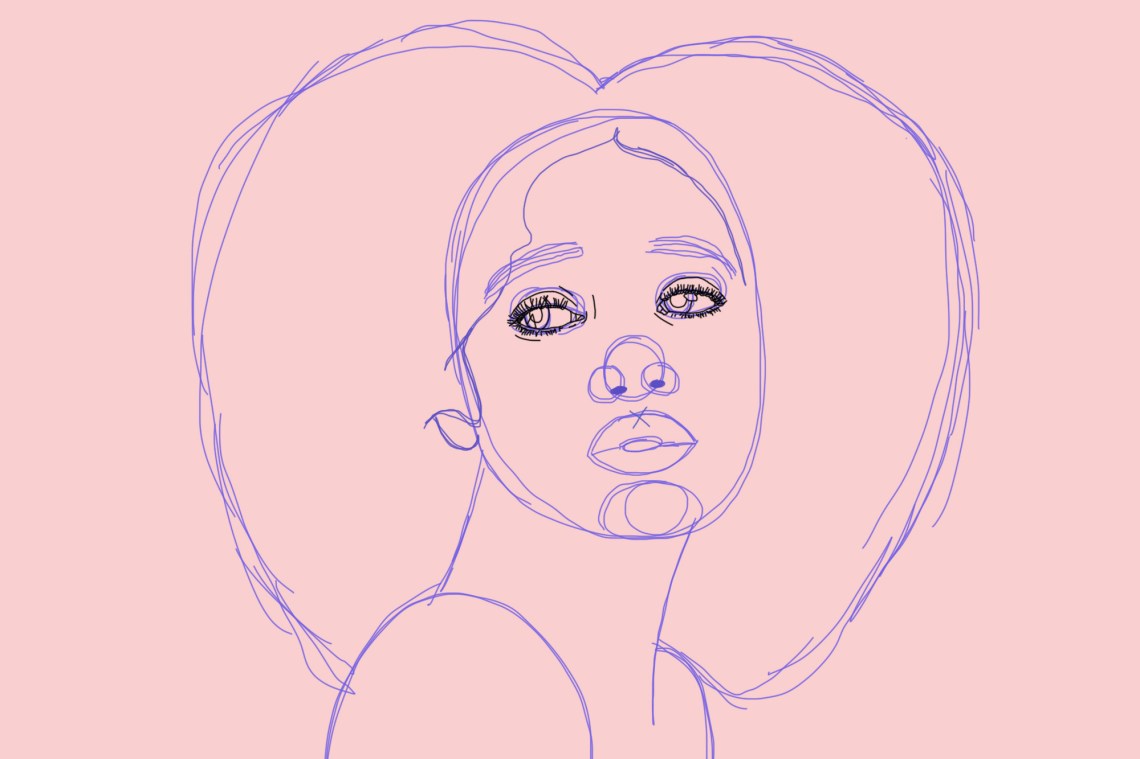
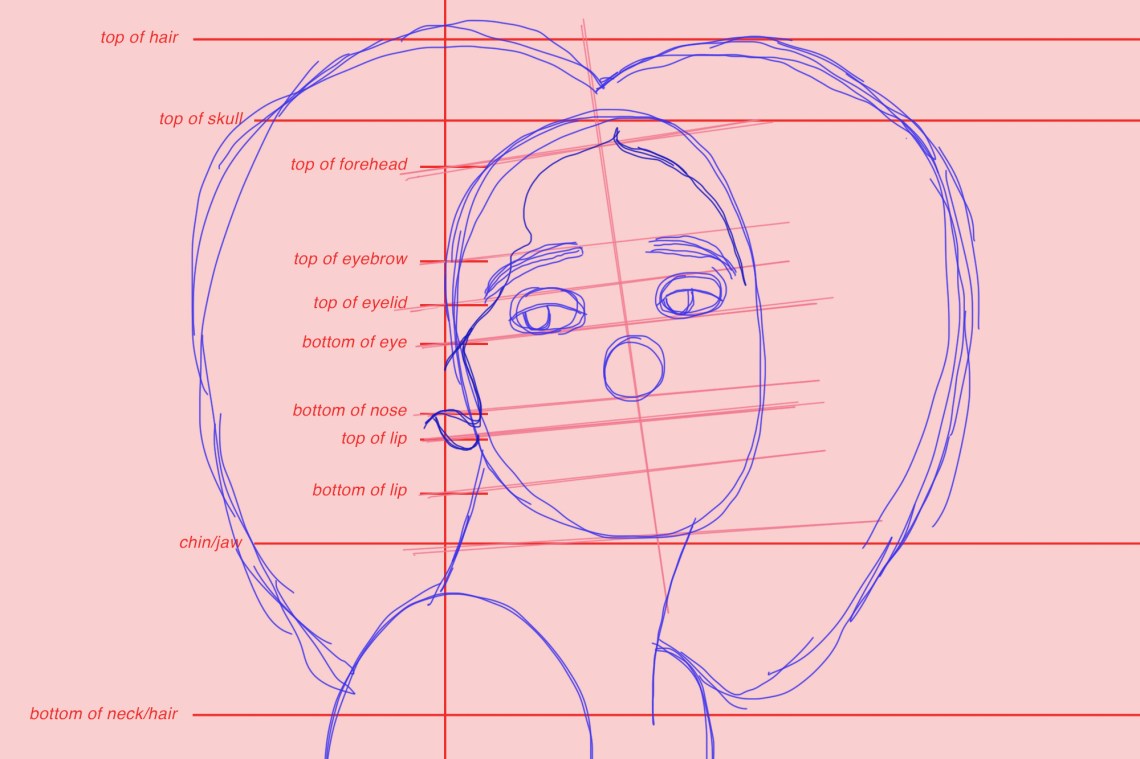
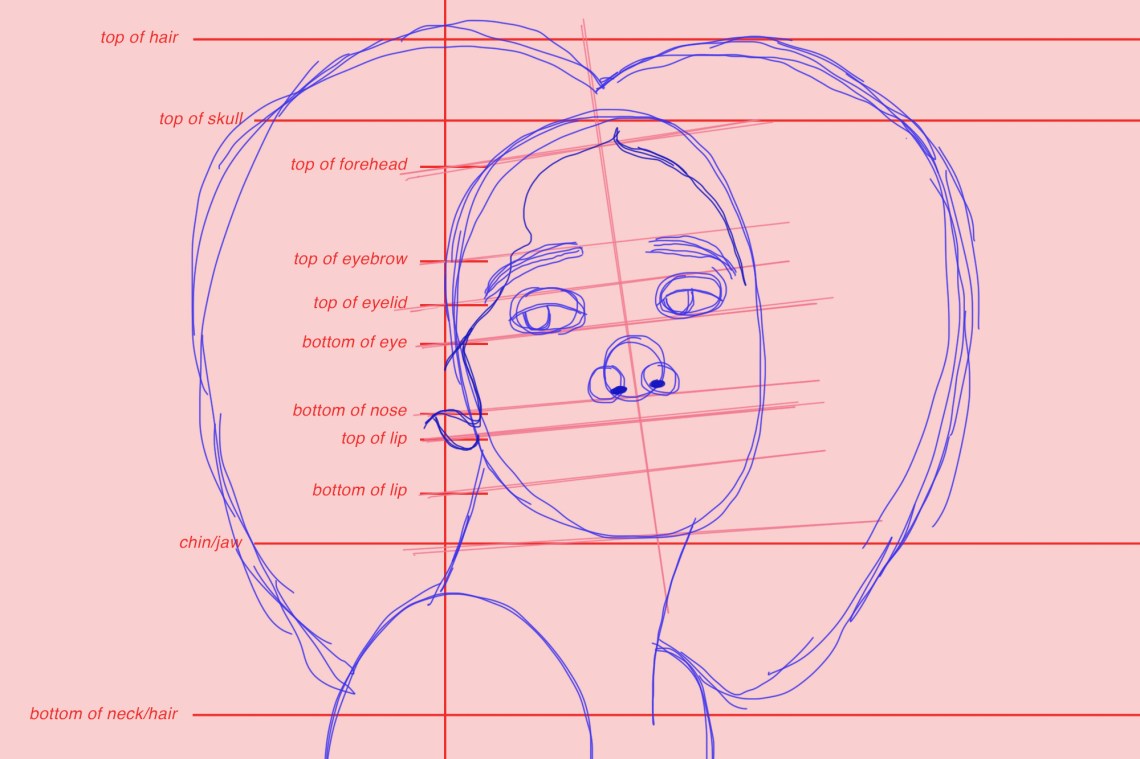
On to the nose!
Hm, Im getting major clown vibes now.
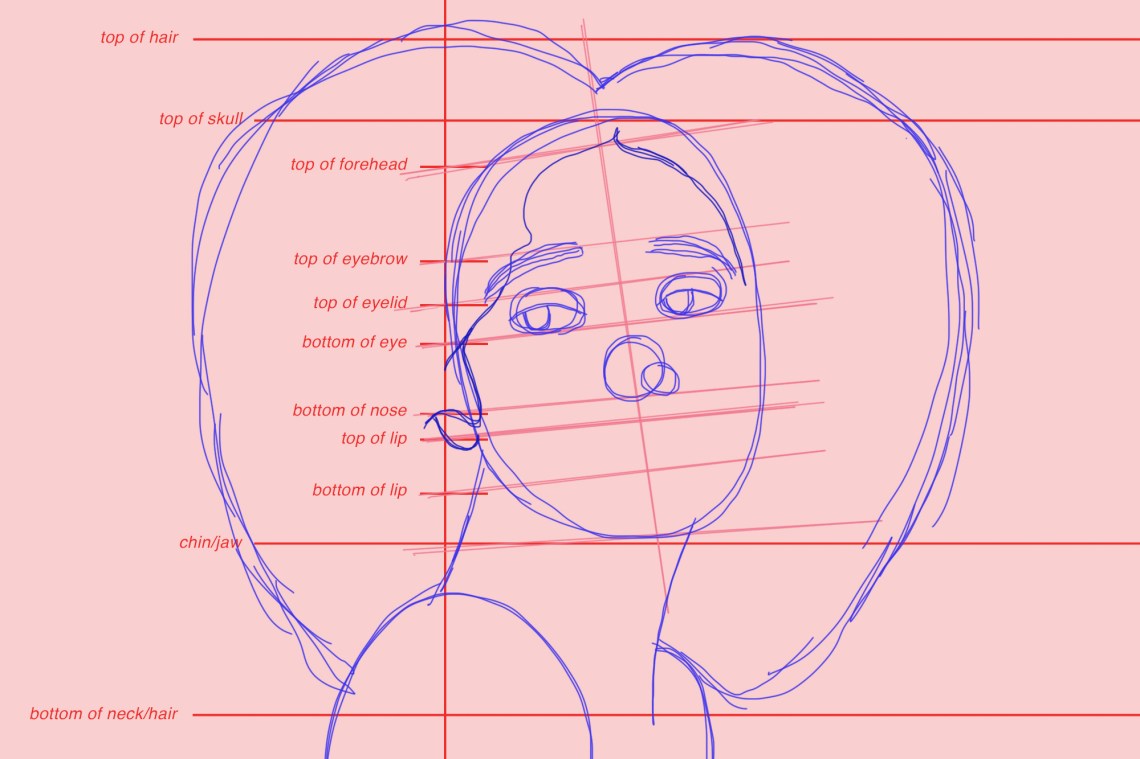
Were going to draw another smaller circle on the side of that big nose circle.

This will become one of our nostrils.
Now for the other side of the nose.
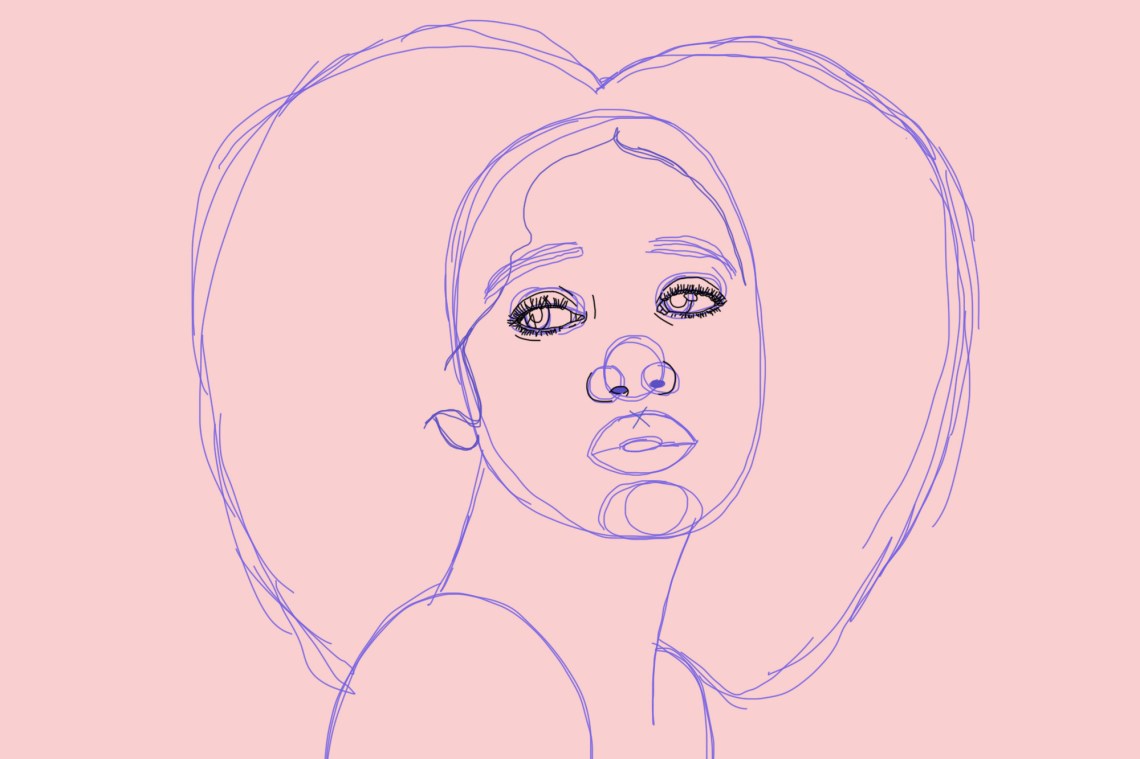
Lets draw in our nostril holes which should be two small ovals that intersect the big nose circle.

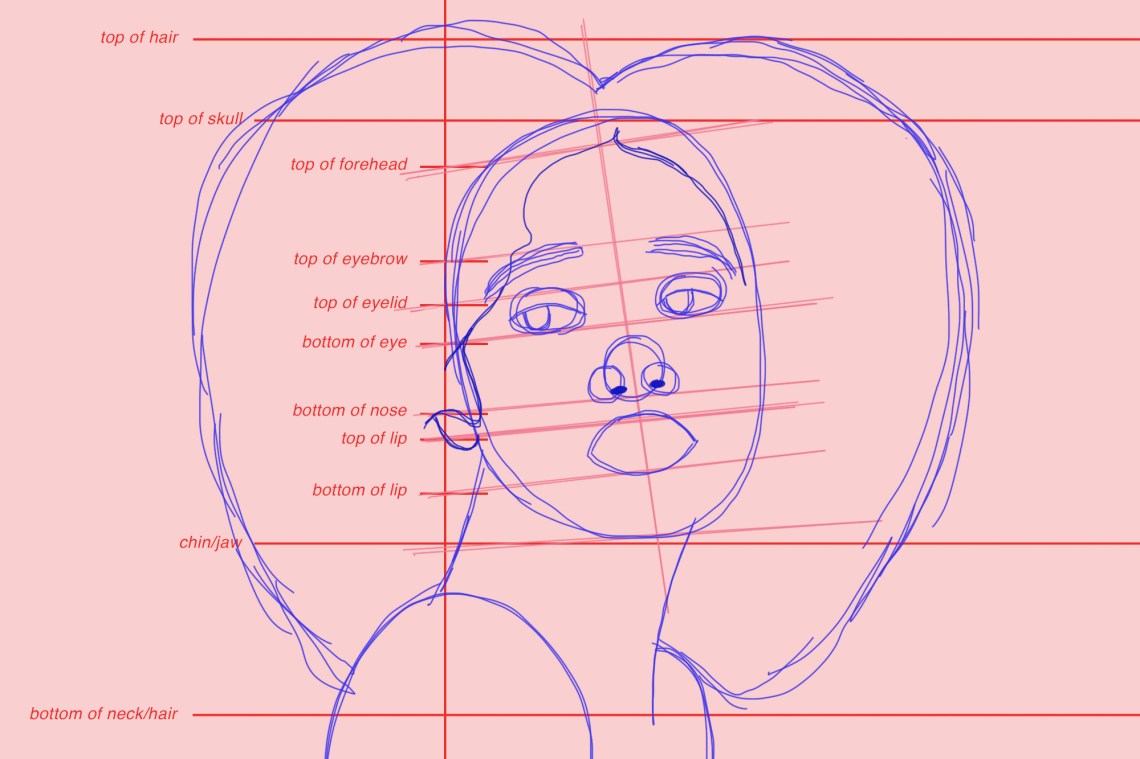
Now we can draw our lip shape.
Its basically an oval with pointed sides.
Or perhaps you’re able to think of it as two arcs joined together.
Whatever floats your boat!
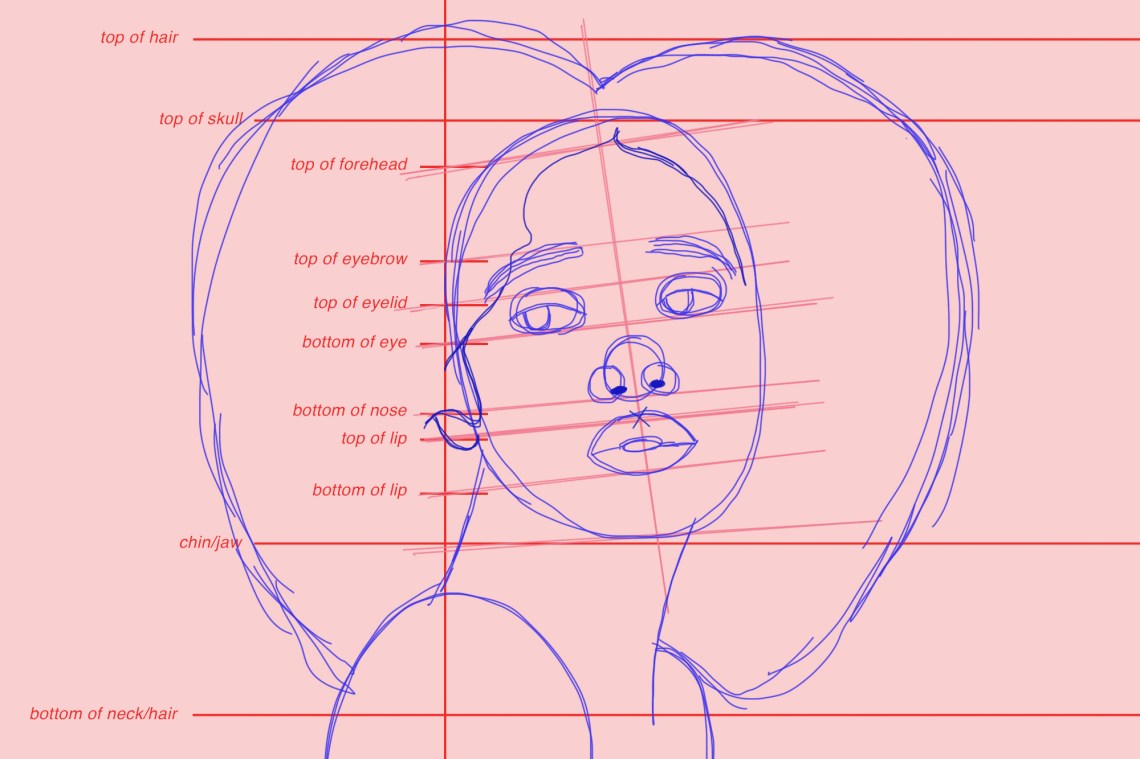
Next, Im drawing an x where our Cupids bow will land.
A cupids bow is the double curved shape that our top lips take at the very center.
It is said to resemble the bow of Cupid.
Fun fact, huh?!
Lets draw an oval for our chin.
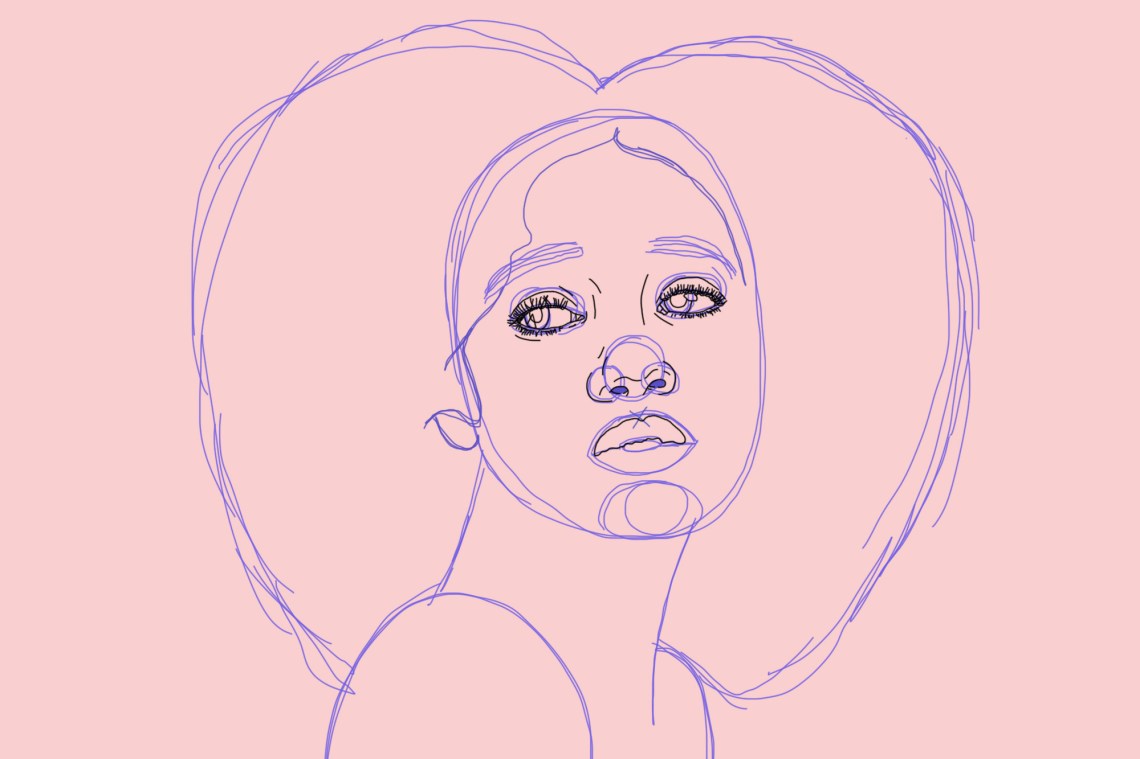
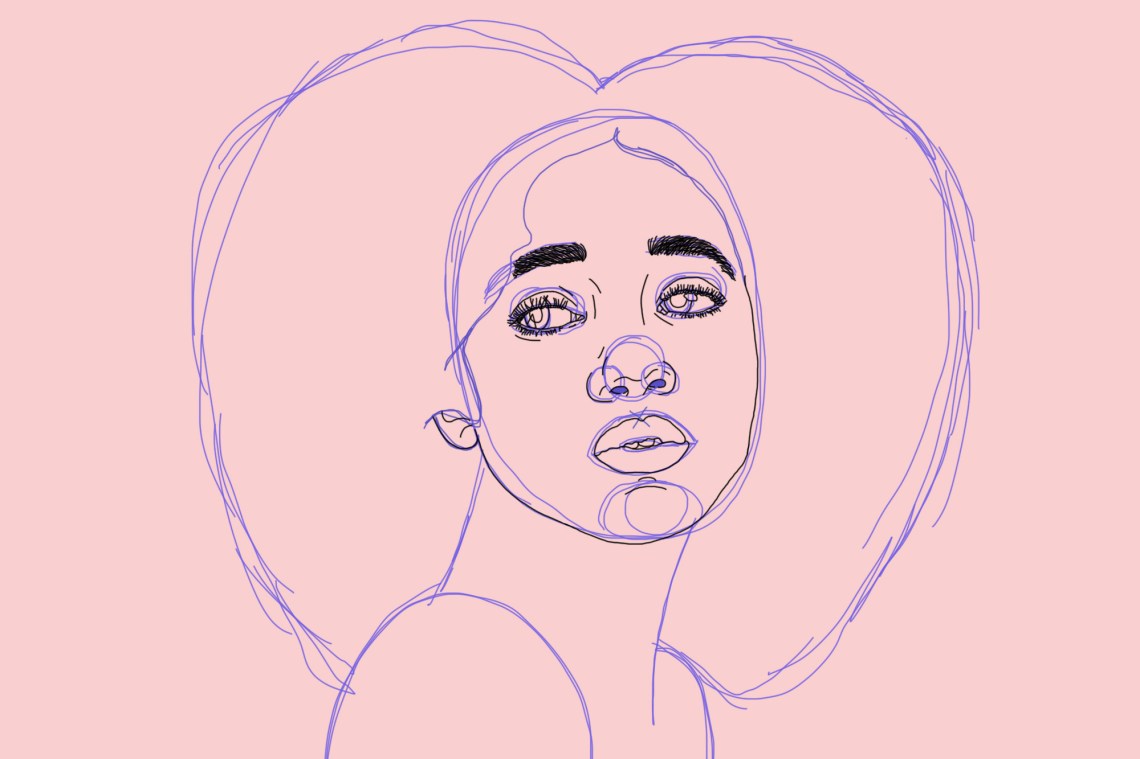
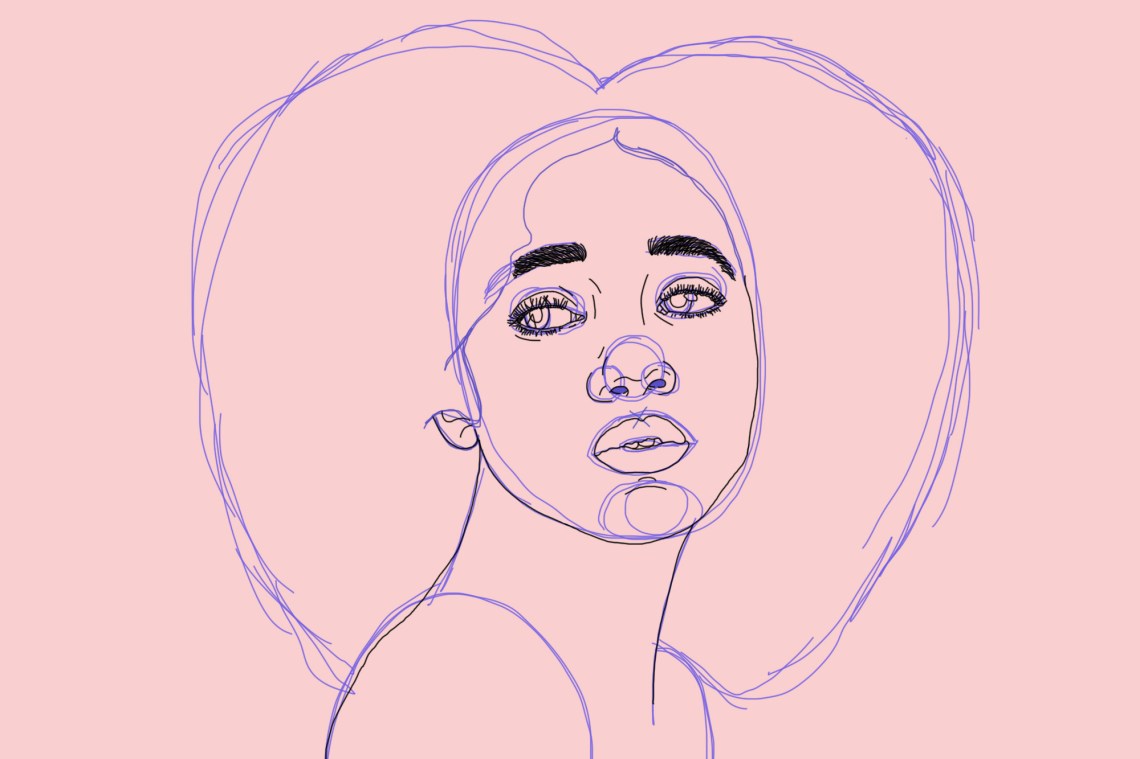
Step Seven: Remove the Frame
48.
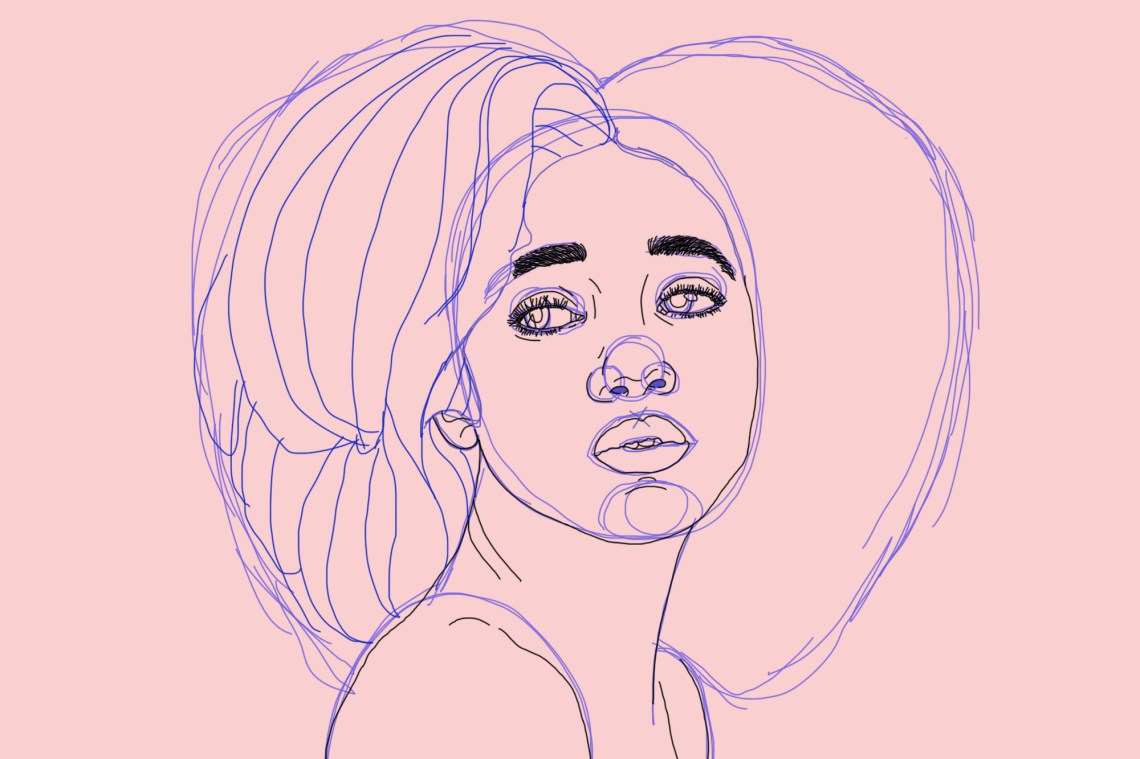
Now, lets finally remove those guidelines.
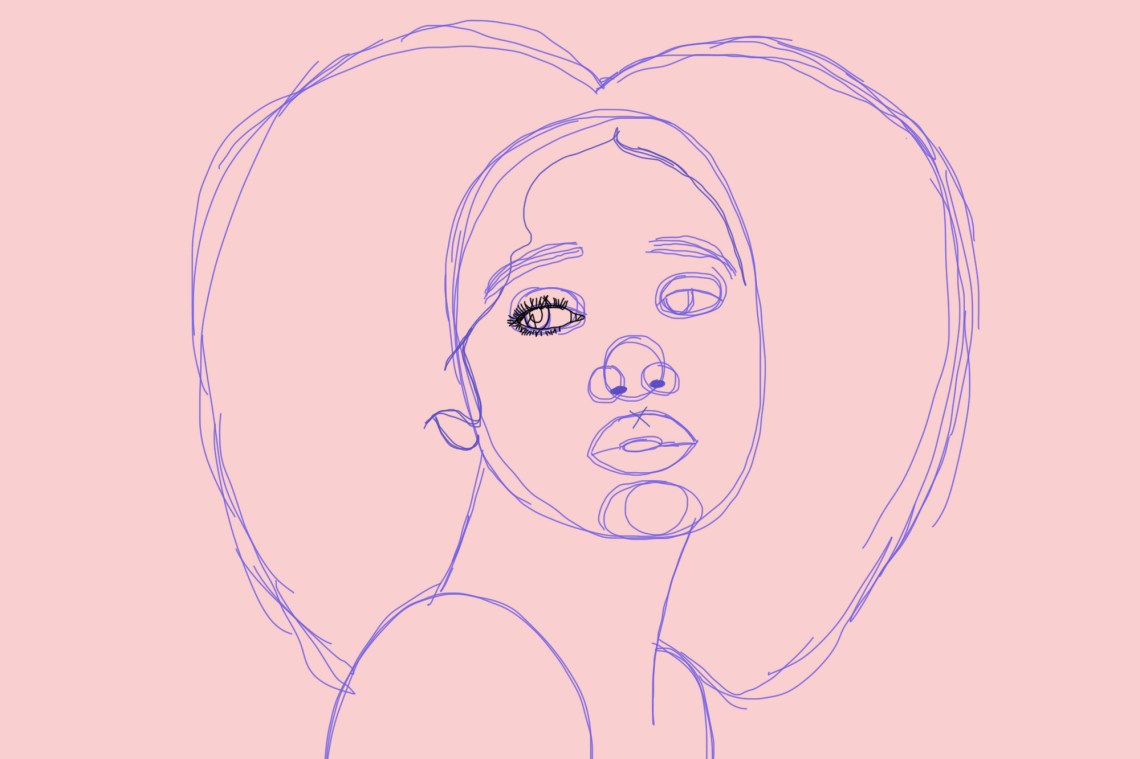
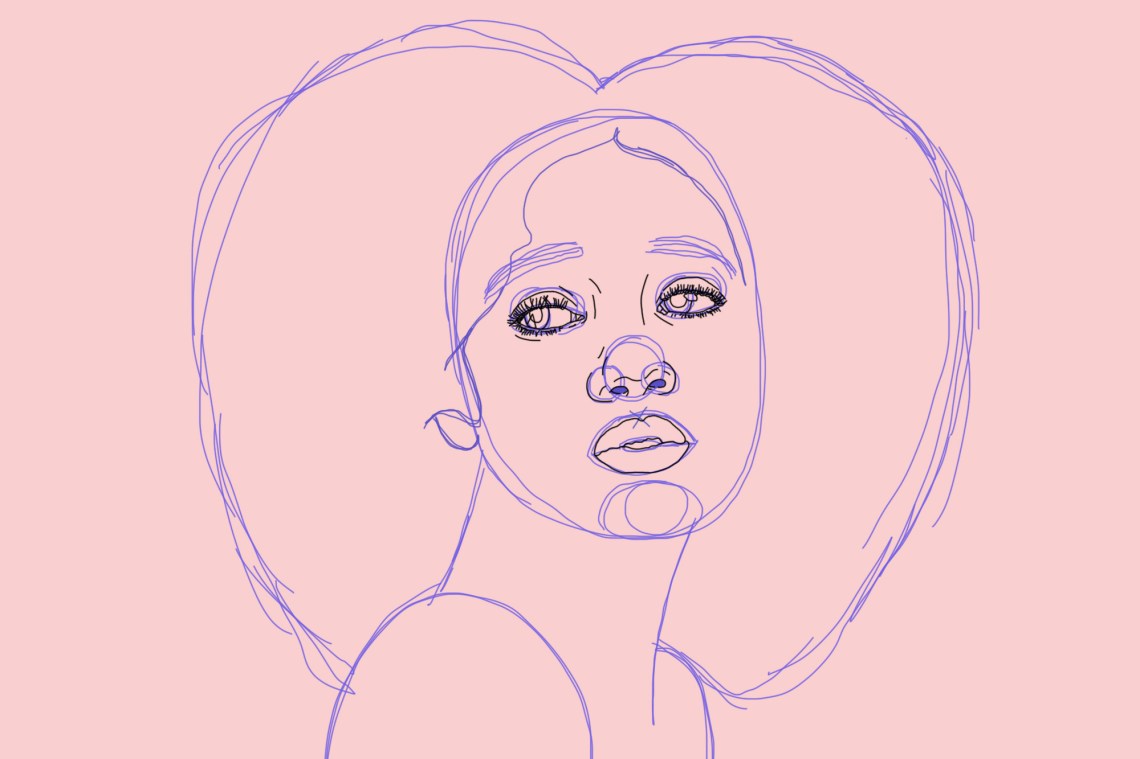
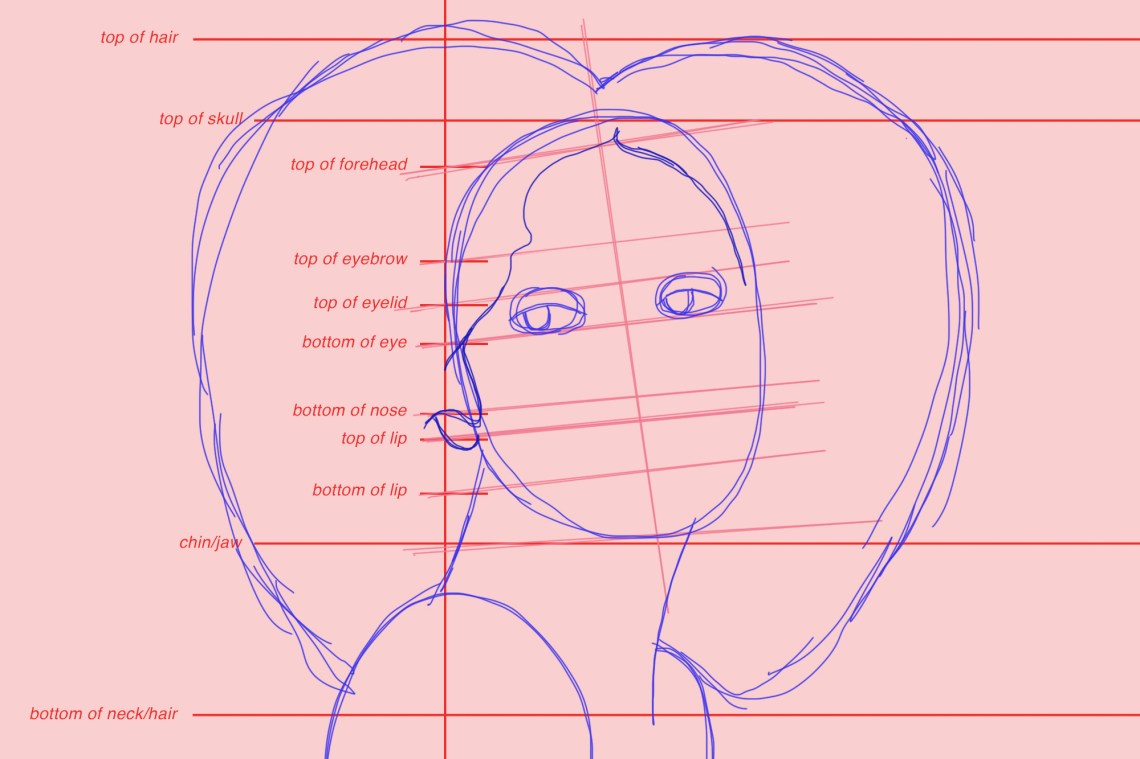
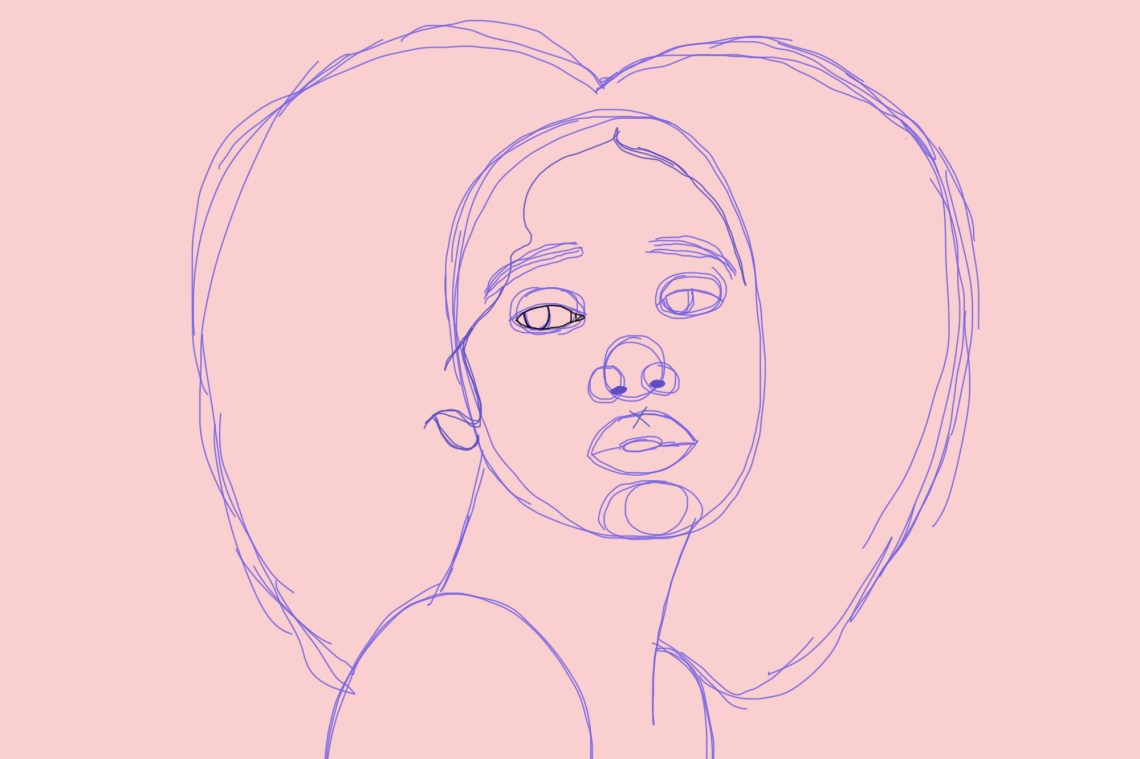
Step Eight: Perfecting the Eyes With Ink
49.
Its time for ink!
Or a really strong pencil.
Lets start drawing in the inside of her eye.
Theres that handy tear duct.
Is it ok for me to cry yet?
Now to separate the tear ducts from the eyeball.
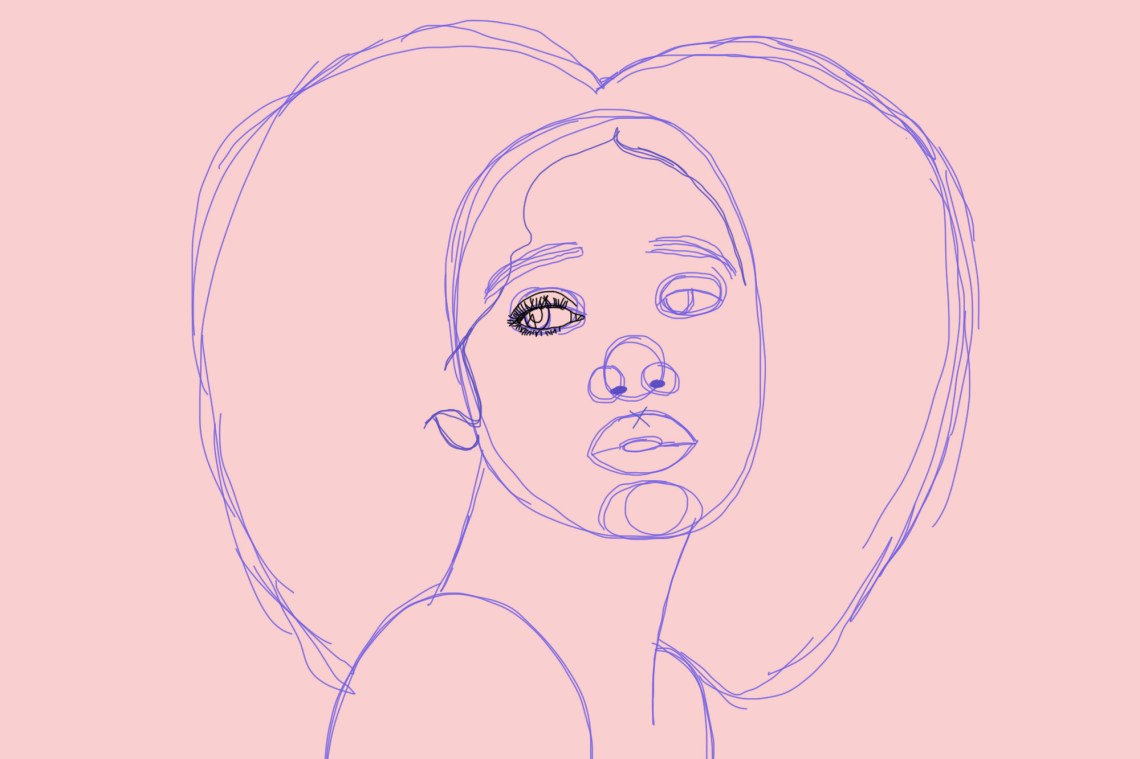
Next is that iris.
And then we draw an even smaller circle within the iris.
We call this the Pupil.
To add some pizzazz, Im drawing in a reflection or highlight into her eye.
Next, Im inserting her eyelashes.
Now for the eyelid crease.
The bottom eyelid crease.
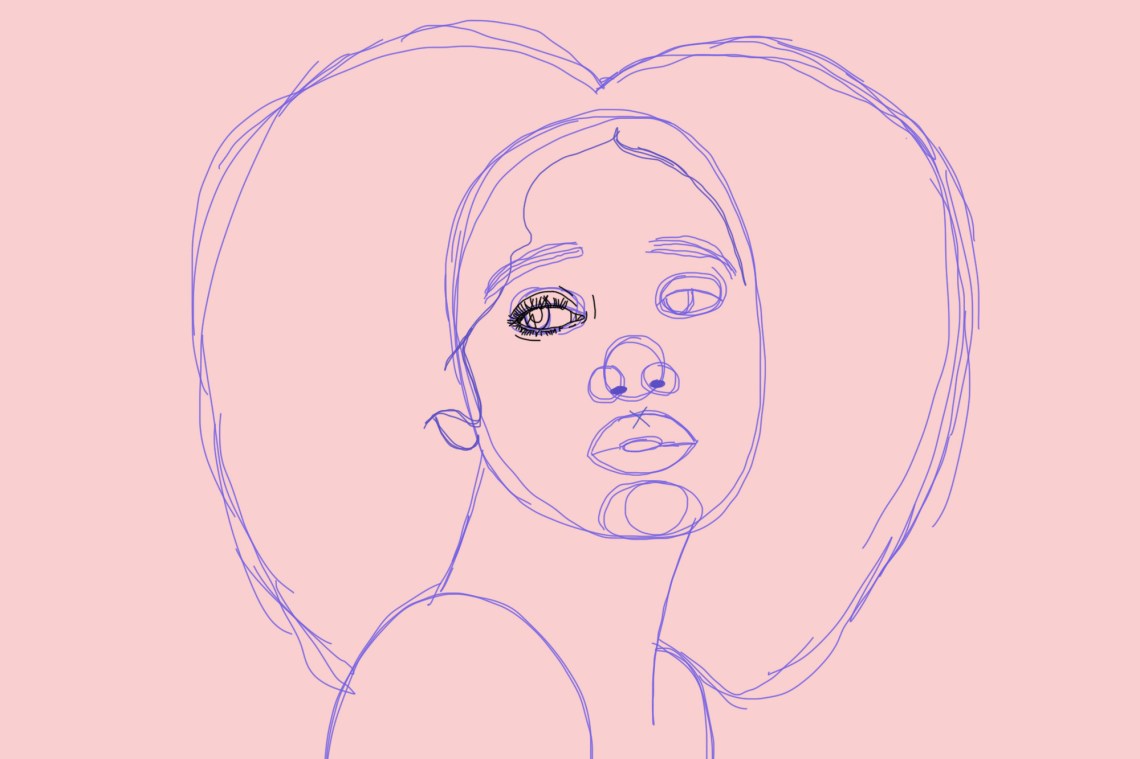
Here Im drawing some more lines around her eye to add more shadows and textures.
Now repeat those steps for the other eye.
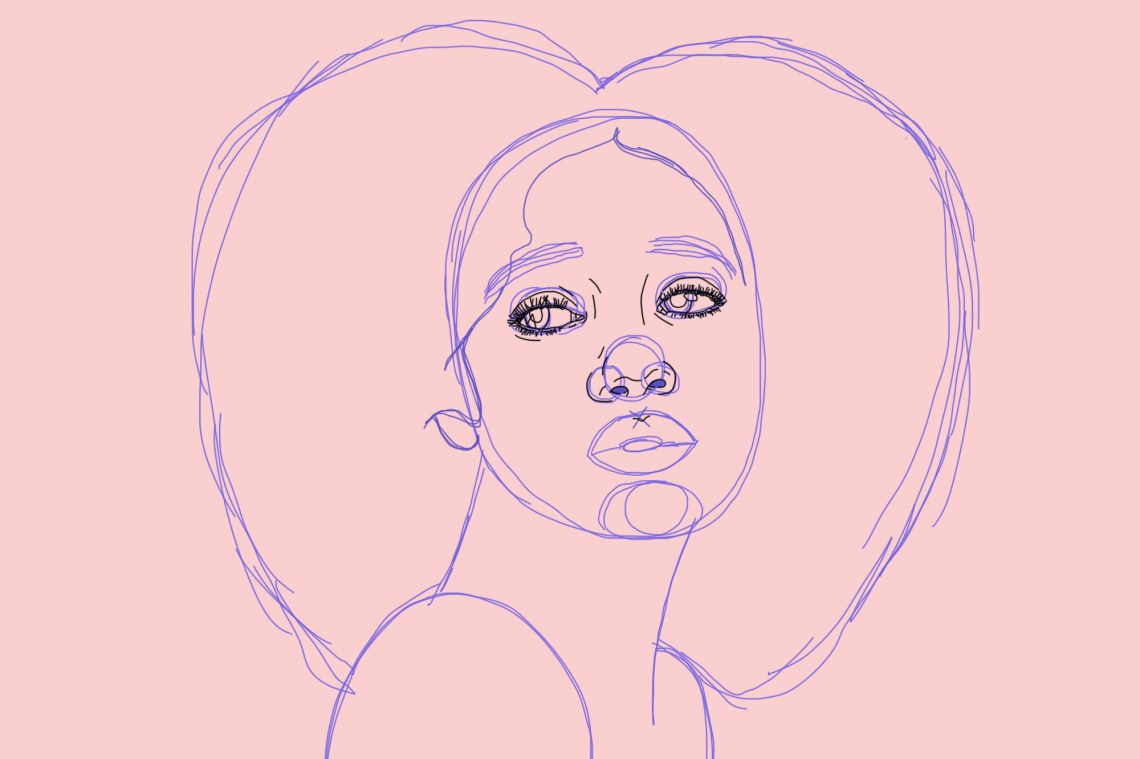
Step Nine: Perfecting the Nose With Ink
60.
Time to ink that nose.
Draw curved lines on the outside of your outer nose circles.
you’re free to stop where the center of your nostril hole is.
Then, well ink around our nostrils.
I didnt make mine a full circle because thats just how I roll.

Next, Ive added some lines around the bottom of her nose to give her some depth.
I like to do this so that the space doesnt seem so empty.
Draw some slightly curved lines for the bridge of her nose.
Now we can draw in that Cupids bow, a double curve.
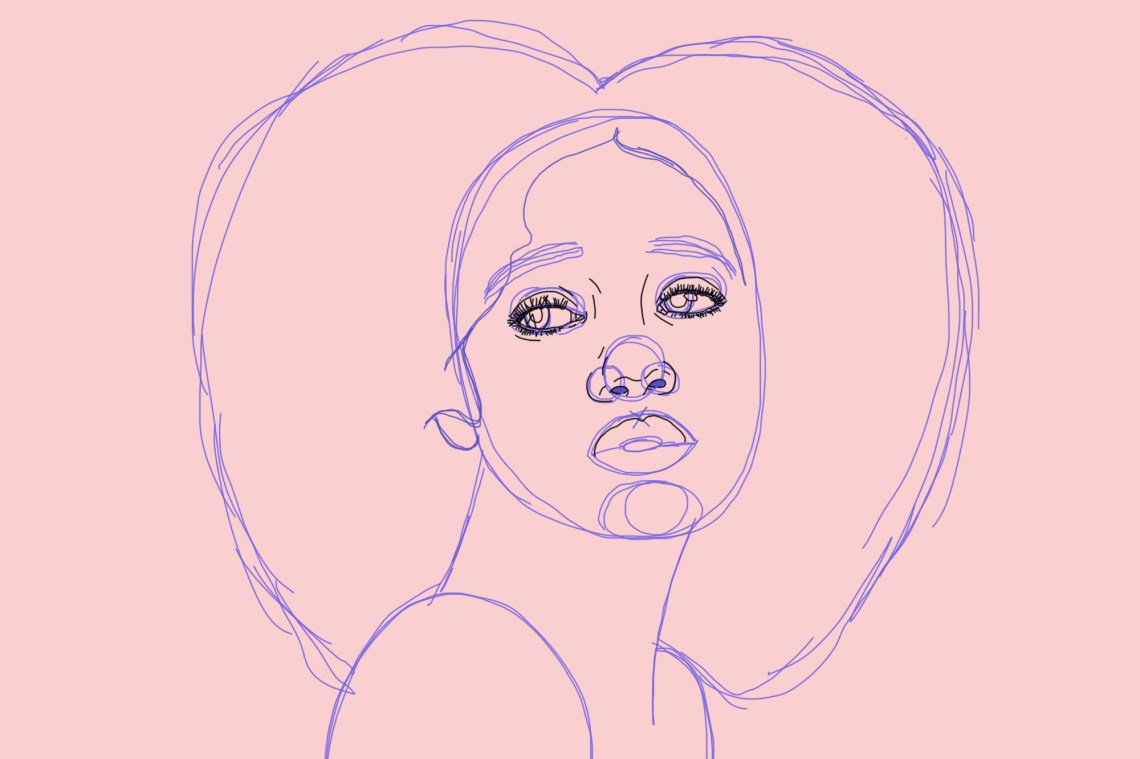
Step Ten: Perfecting the Lips With Ink
65.
And then we draw the rest of that top lip.
The interior lines of that top lip.
Our bottom lip line.
The interior bottom lip line.
While were down here, lets draw in some teeth.
You only really see her two front teeth so lets just draw the bottom of those.
Im adding some quick curved lines for the chin.
Not necessary but something I personally like to do regardless.
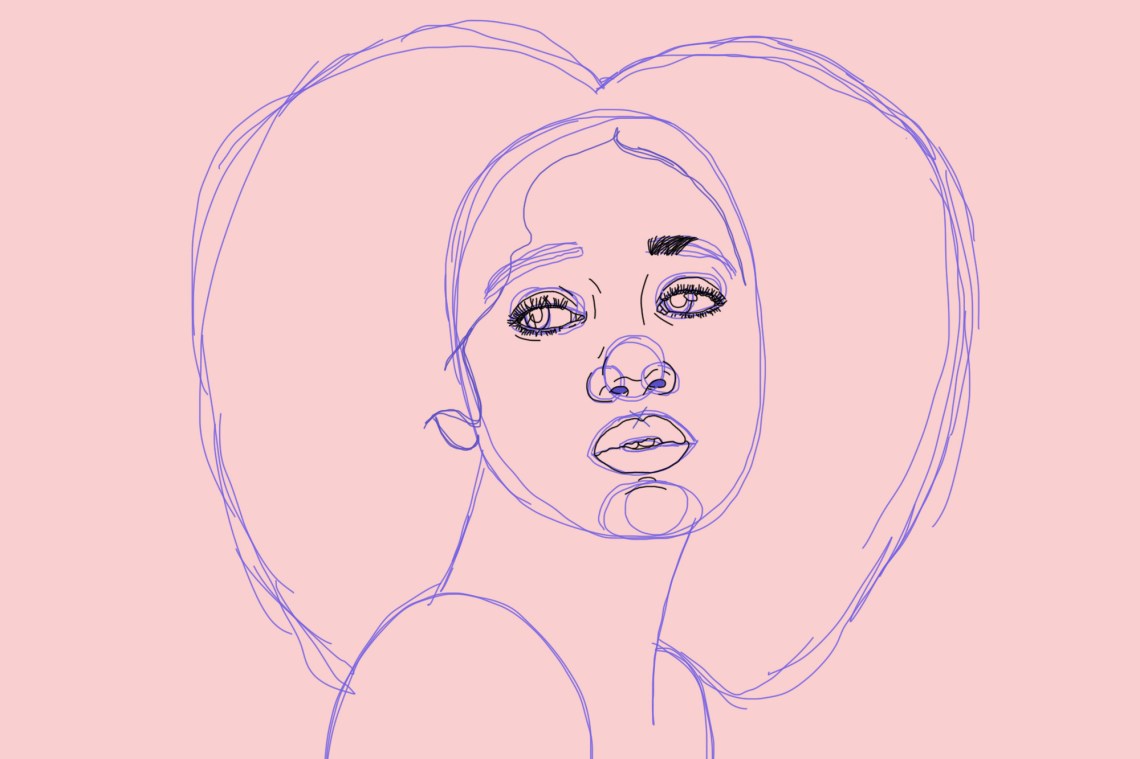
Step Eleven: Perfecting the Eyebrows With Ink
71.
Here comes those eyebrows.
They should eventually curve more in a horizontal direction the further you get to the outside of her face.
Oh wow, were done with that one already!
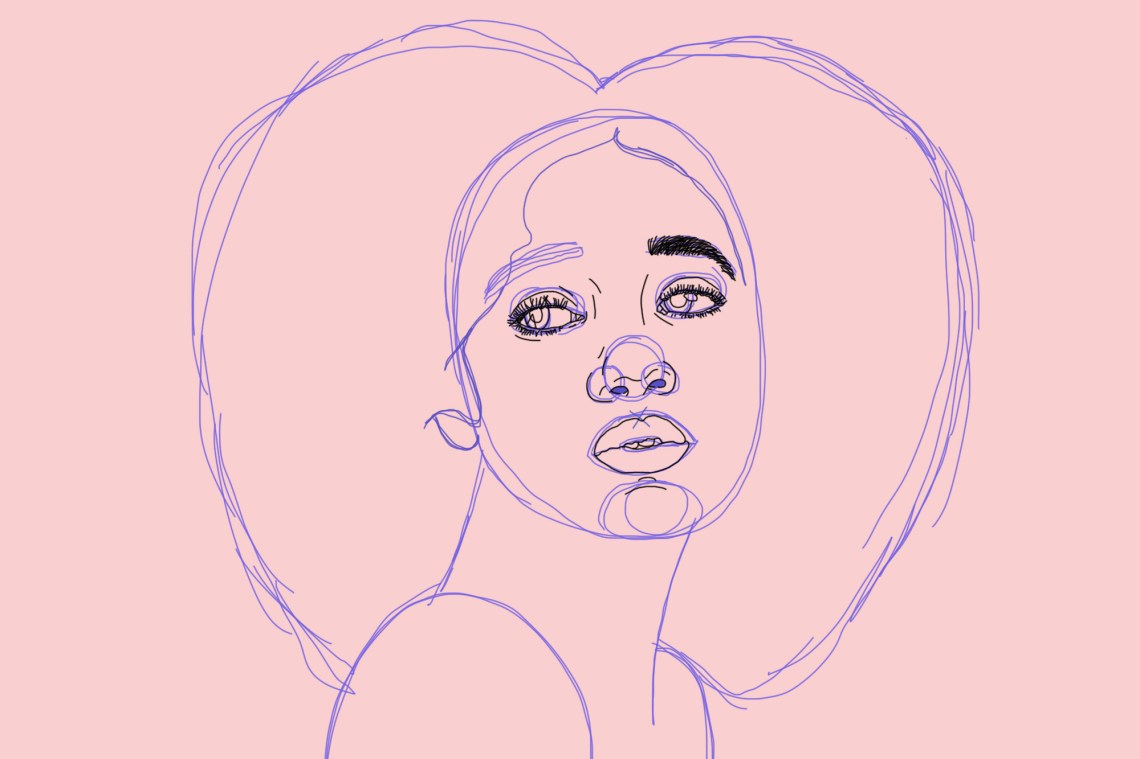
Repeat for the other eyebrow hey.
I stopped about halfway through this one as she has some hair covering it.
No point in doing extra work, right?
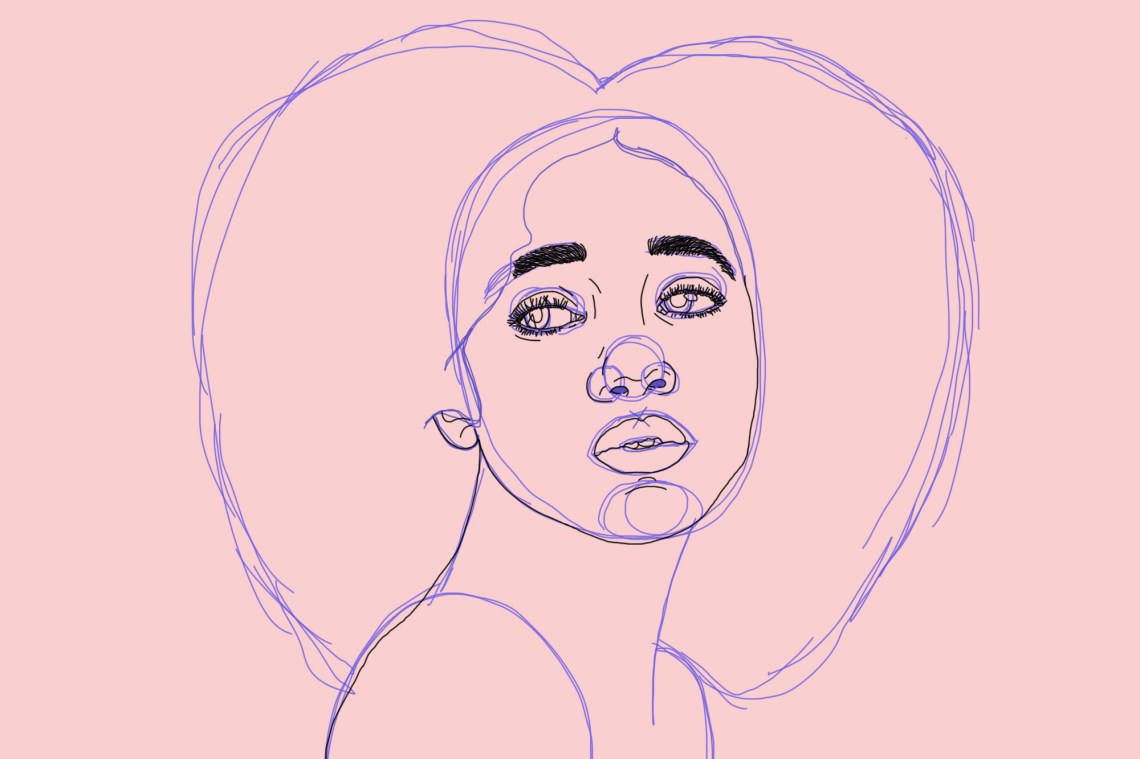
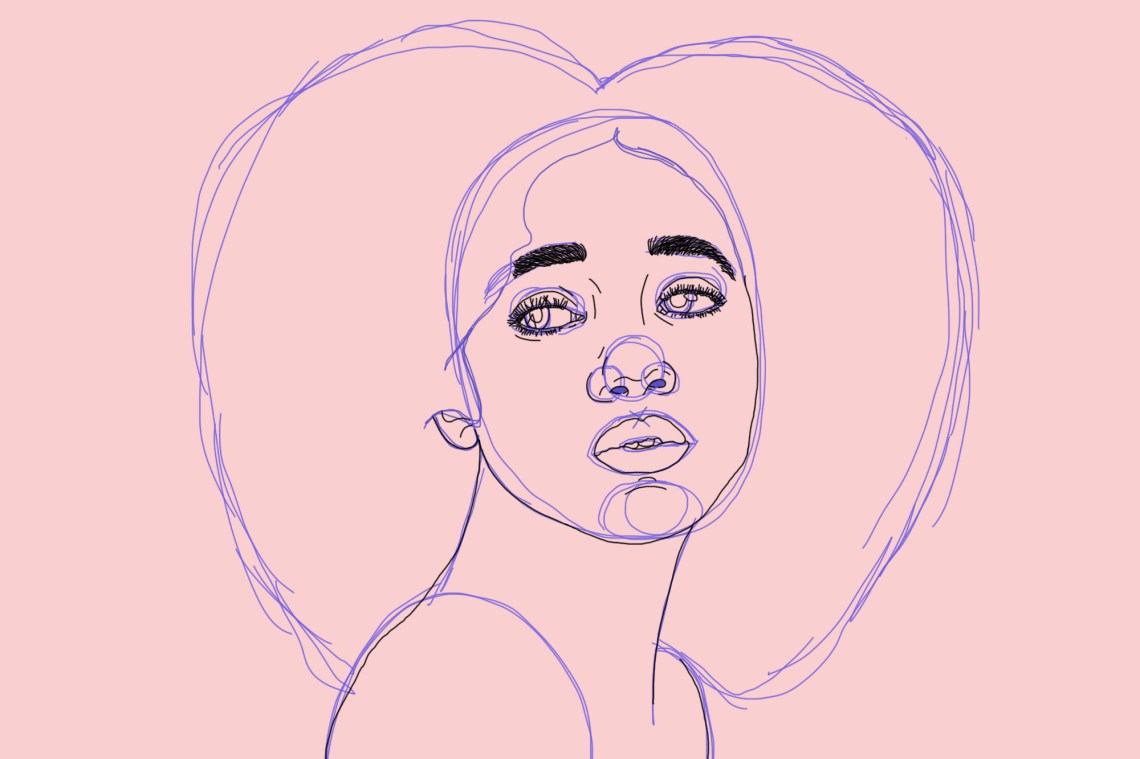
Step Twelve: Framing Other Features With Ink
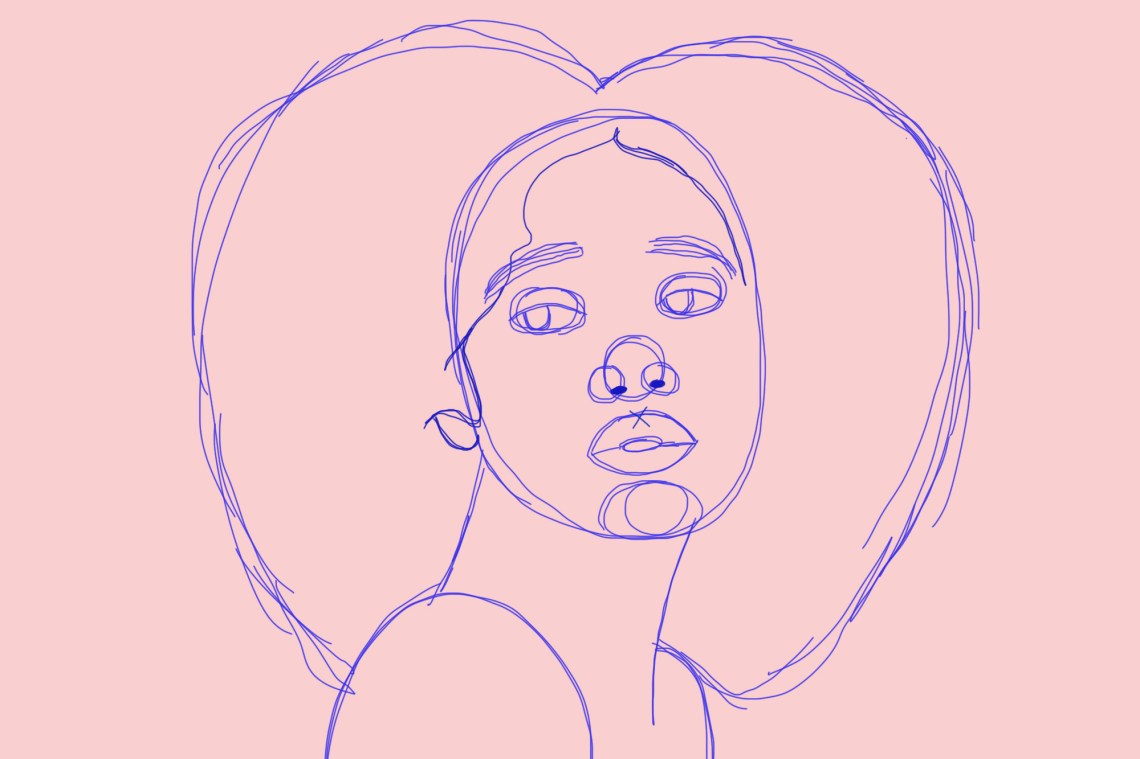
73.
Speaking of the ear, lets draw that in too.
Ink in the left neck and shoulder lines.
The other neck line.
And the other shoulder.
Next we draw in the top of our arms, shoulders, and chest.
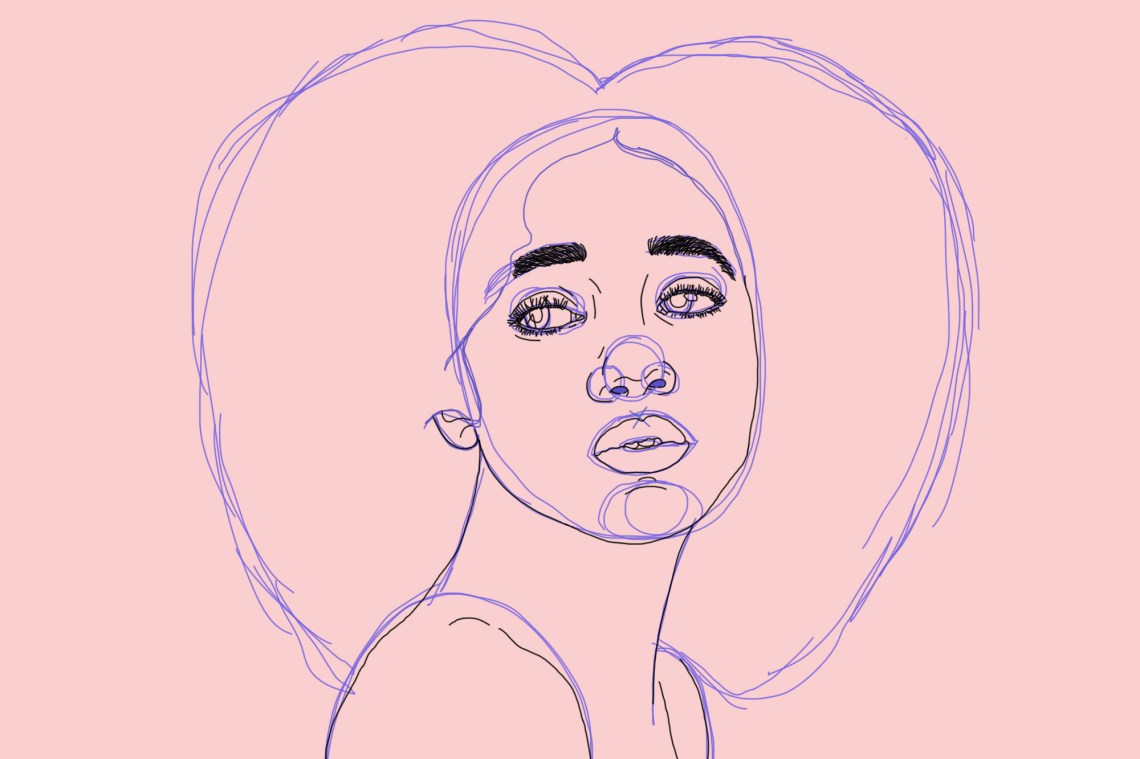
Step Thirteen: Making the Photo Realistic
79.

Since shes twisting her neck to look at the camera, theres some creases that appear.
Im putting those in here.
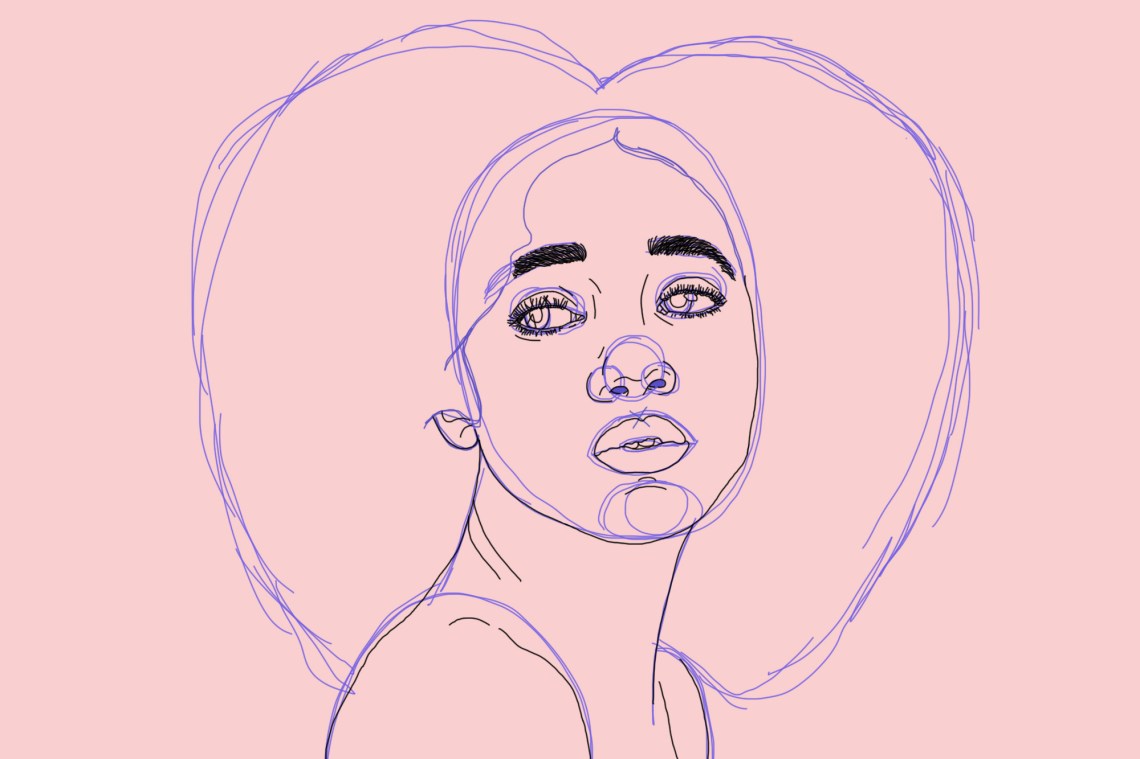
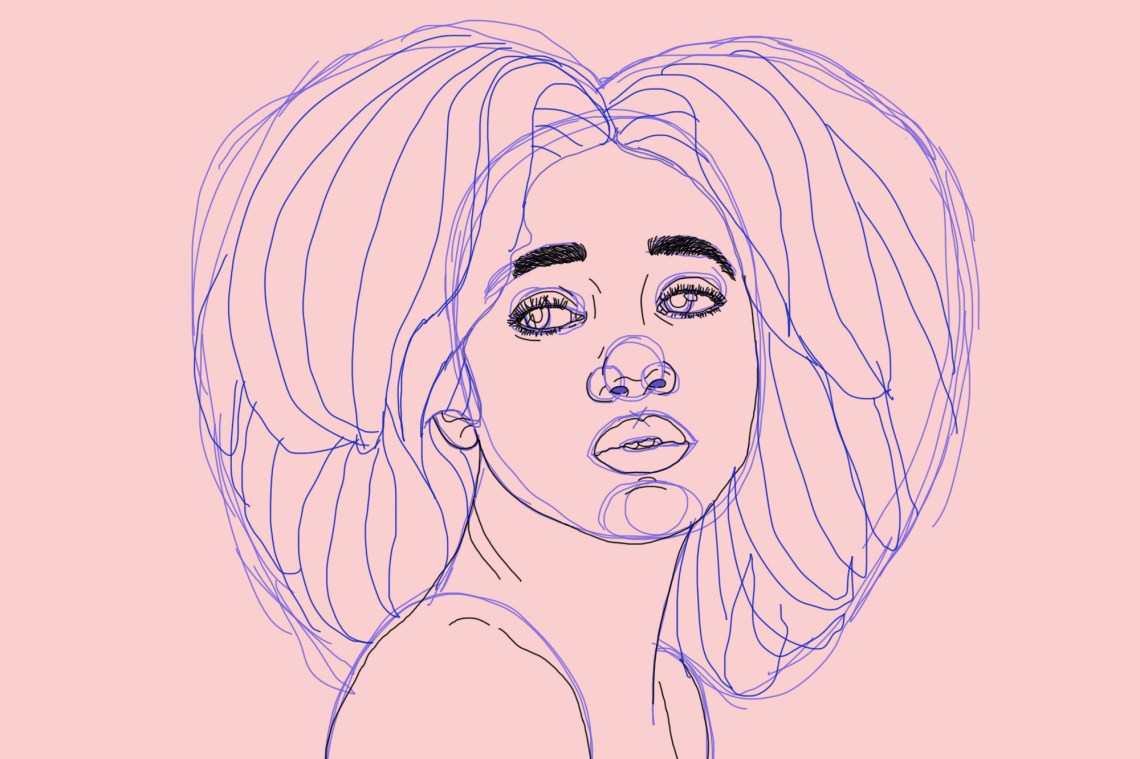
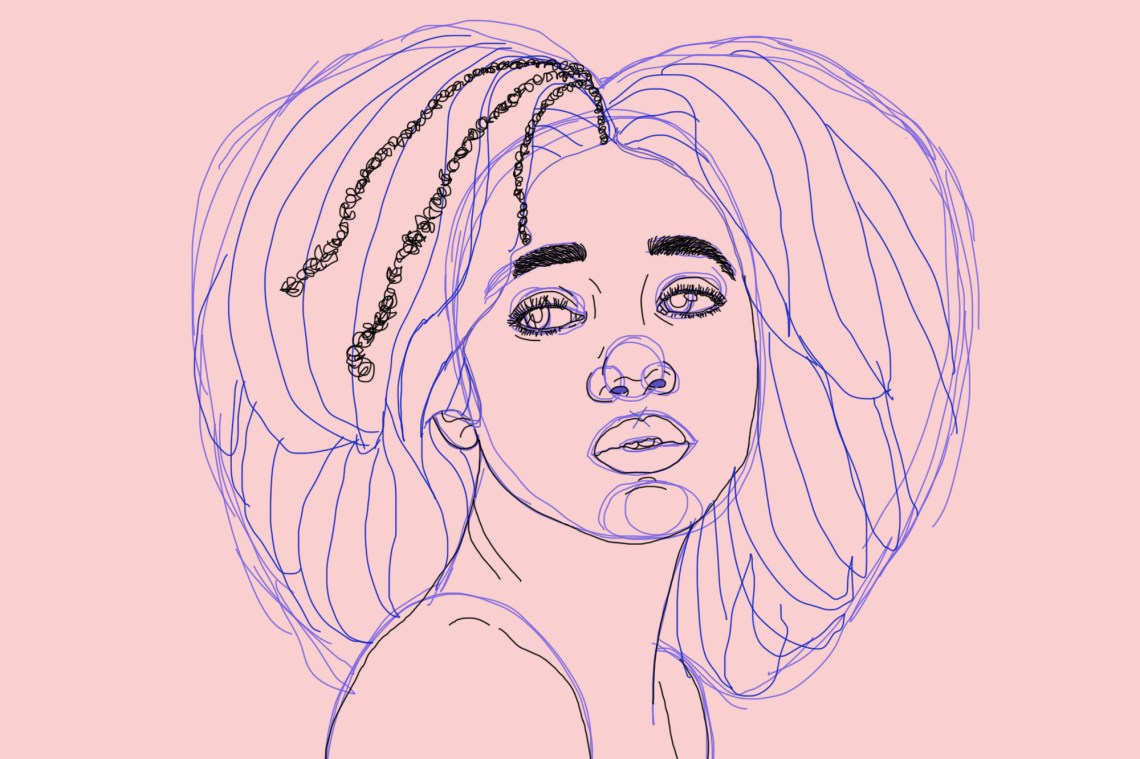
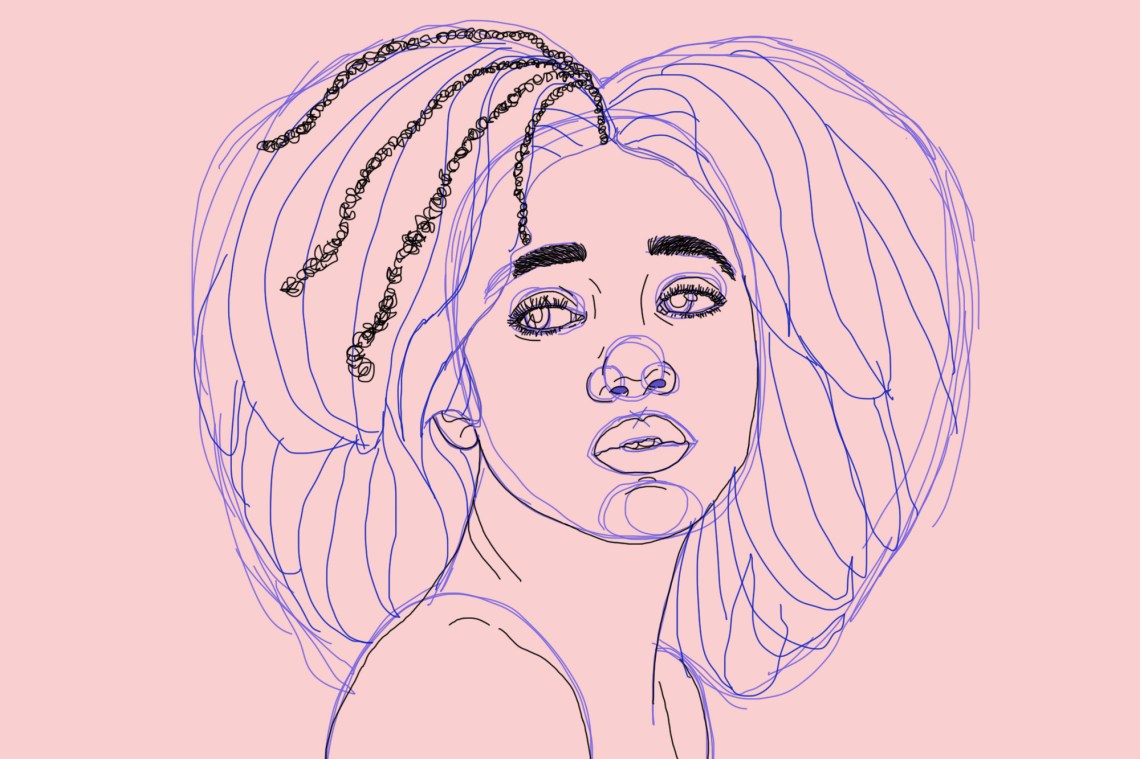
Step Fourteen: Add More Guidelines for the Hair
80.
Alright, now its finally time to do that magnificent head of hair!
Do the same for the other side.
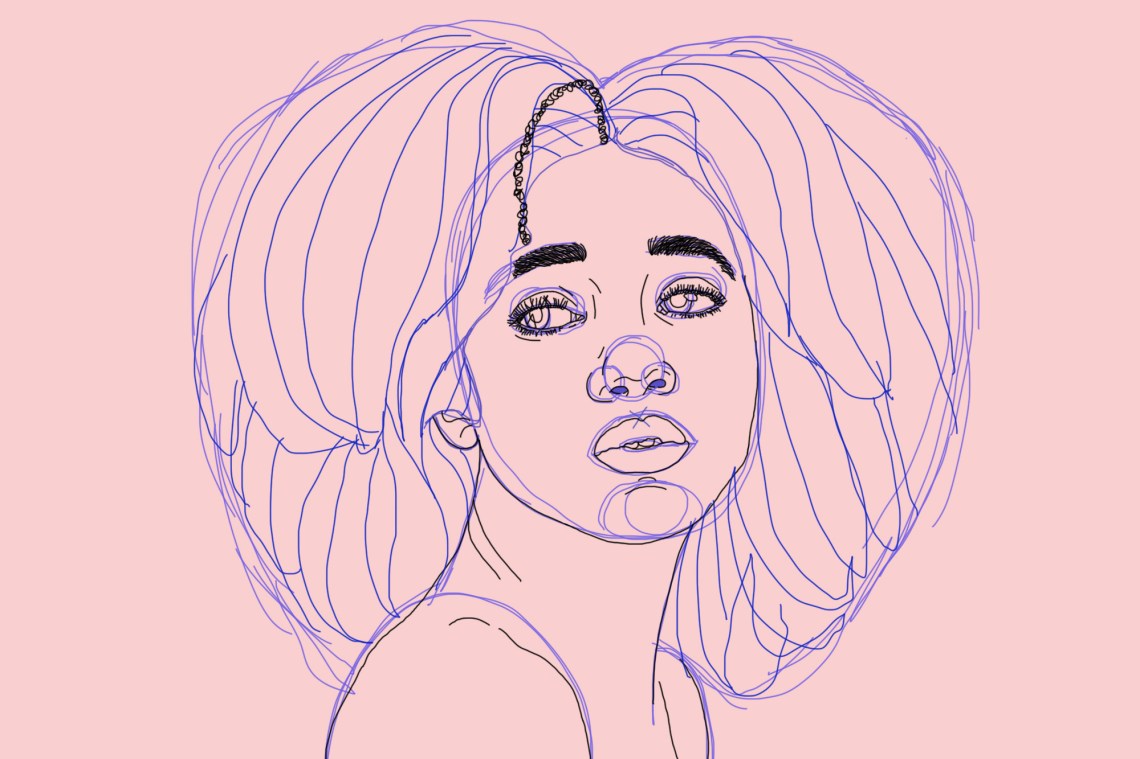
Step Fifteen: Drawing the Hair
81.
There are different ways to draw hair.
The way I like to do it is drawing each individual strand.
Tedious and time-intensive, I know, but it gets some good results in the end.
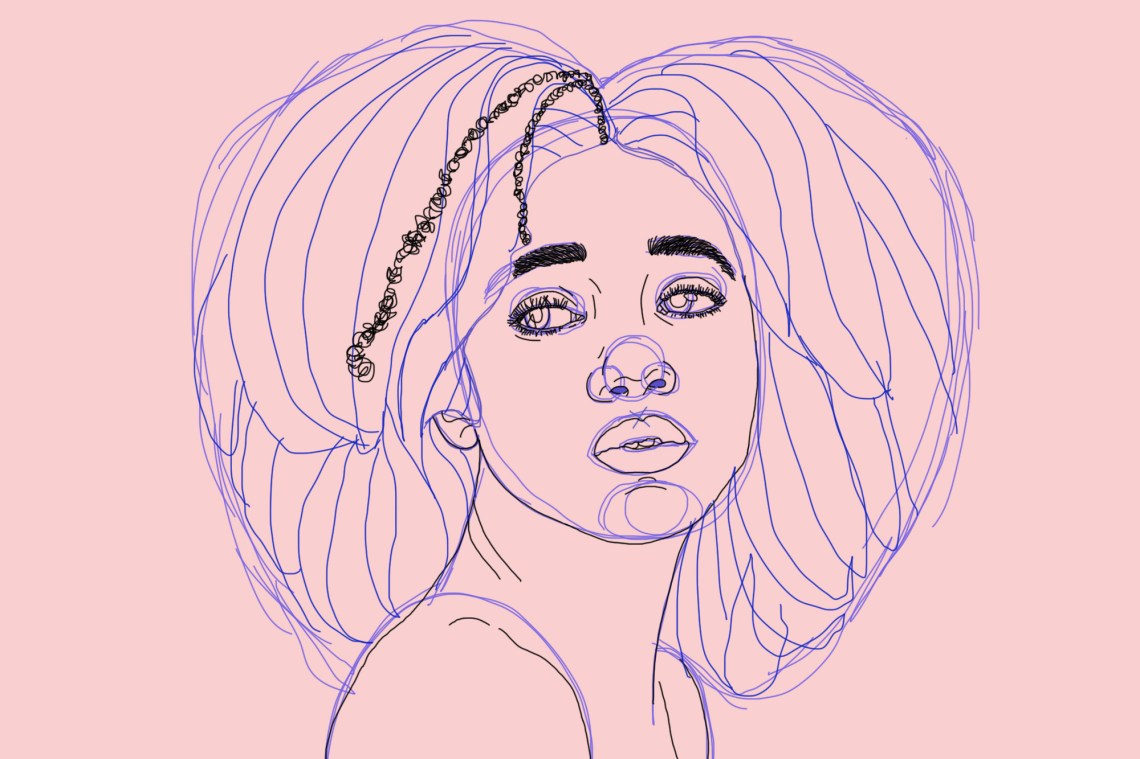
Im going to lay out some other individual strands to help you understand how Im doing it.
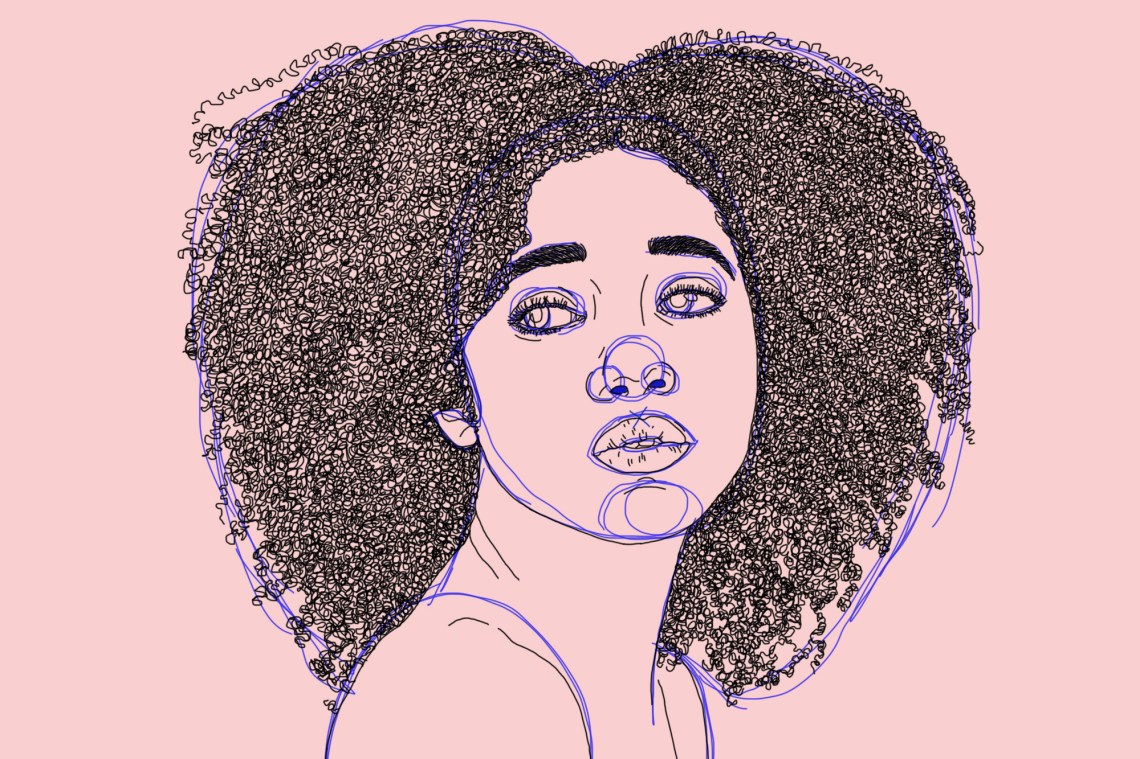
Ok. Now away-y-y we go!
Aaaand its all done!

Just waiting for that Carpal Tunnel to kick in!
Step Sixteen: Erase the Hair Frame
84.
Erase those pesky sketch lines.

it’s possible for you to totally stop here if you want or add some color with me!
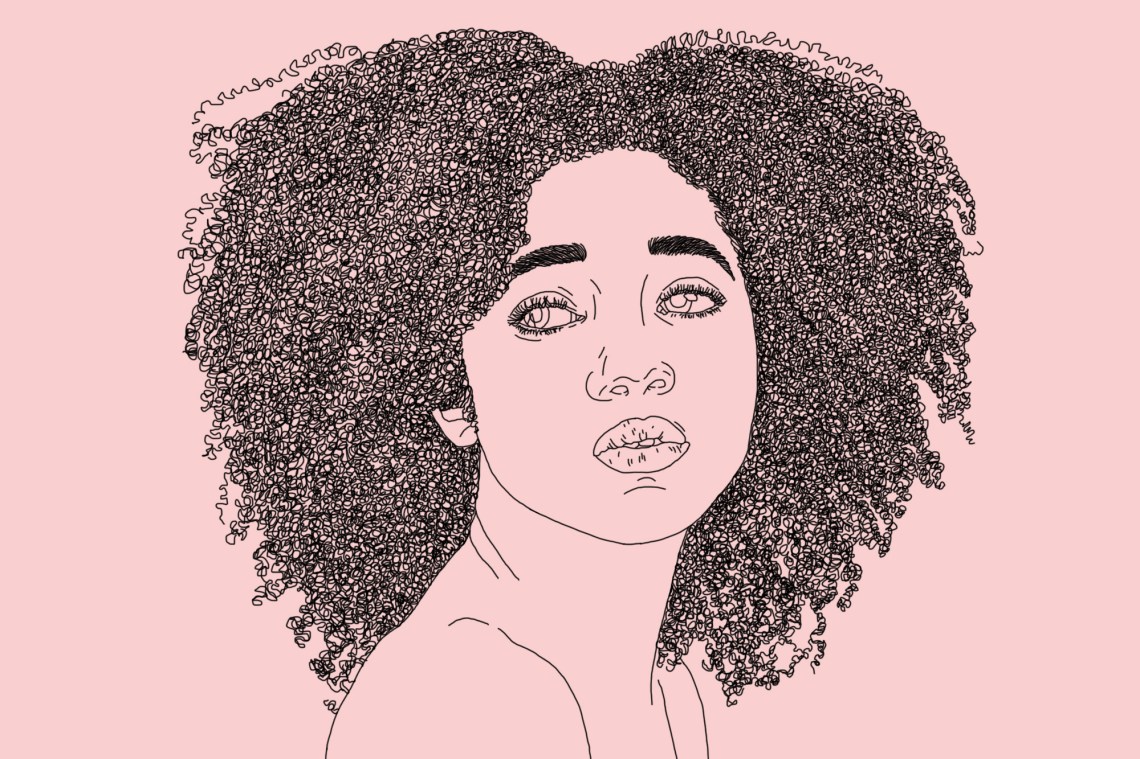
Step Seventeen: Add Some Color
85.
Step Eighteen: Shade & Add Texture
86.

Im also adding in some shadow to give her some more depth.
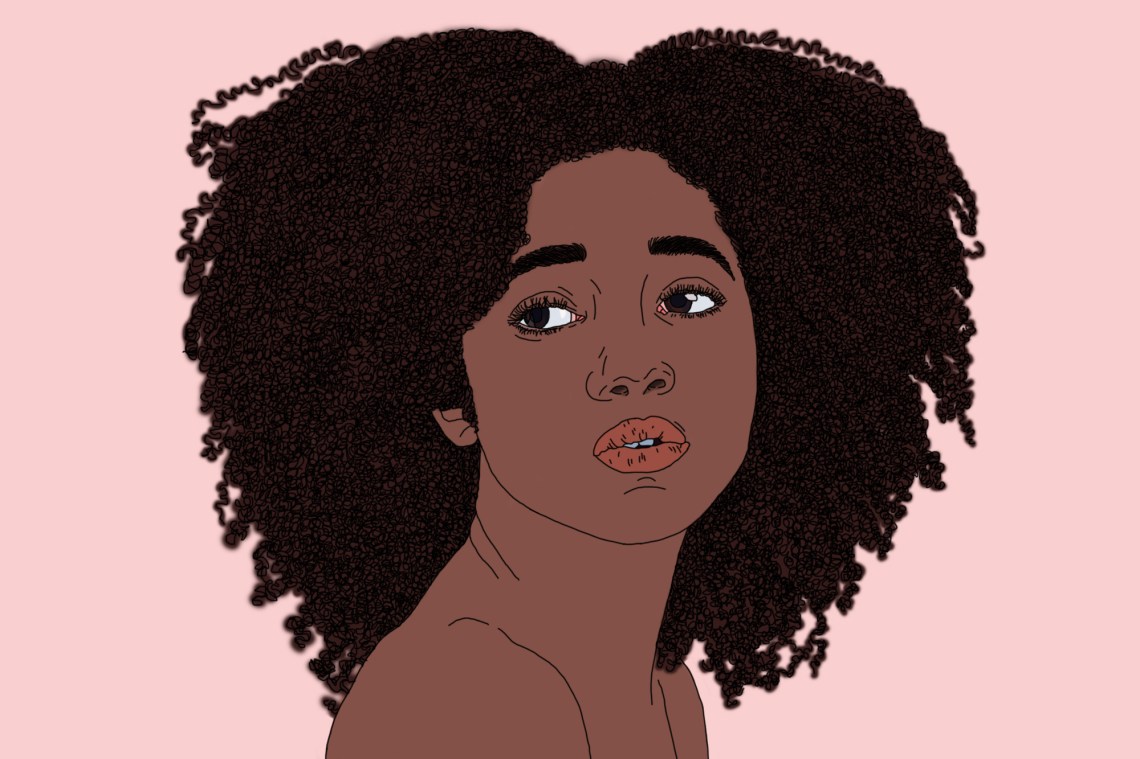
And there you have it!
One order of girl coming right up!
More Drawing Tips
For more step-by-step drawing guides, visit these awesome resources: